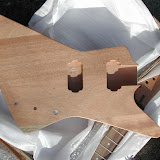
They come from http://byoguitar.com/ and mine was about $170 total with shipping.
I had built a AXL strat kit before (same thing as a Saga) and wasn't very thrilled with it, though it did turn out OK and was playable. In particular I didn't care for the basswood body that had been absolutely drowned in this thick plastic coating they called "sealer". I was leery of that with the Explorer, but pulled the trigger anyway figuring I'd just strip it first.
I placed the order on tuesday afternoon and, to my surprise, had the kit in hand friday after work! I was also pleasantly surprised by the overall quality. Particularly the sealer coat...they said one thin coat on the webpage and they meant it. It's obviously enough to afford some protection to the wood for shipping and that's it. A plus in my book.
So last night I got started on it. I had tested the neck fit and ntoiced the neck was too big, or the pocket too small (depending how you look at it) for the neck and body to mate. In reality, it's pretty close and overall a good thing. It allows you to use files and sanding blocks to taylor the neck pocket fit precisely, which is what I spent about an hour doing. Then I pushed the neck into place (it was a tight enough fit I could pick the body up by the neck no problem) I checked neck angle and how centered it was with the pup routes.
All that was fine, so I had the bright idea to check the neck pickup...see if it would fit OK. It didn't...or rather barely did. I slid (hammered) the neck up about 1/16th" and all was fine. I put some pencil marks on the body as a visual reference for myself when I glued the neck in.
I took the neck back out, cleaned everything, made sure I had all the sealer sanded away on the gluing surfaces and then generously slathered the neck and pocket with Titebond III wood glue. I jammed the neck & body back together, got it lined up and clamped. This caused a lot of the extra Titebond to squeeze out, so I took the clamps back off and cleaned all that up with a damp rag. Titebond III has a 10 minute working time, so all was going to plan. I reclamped everything and then decided I would follow their instructions for structural joints and not bother it for another 24 hours. Pics below and more to come, eventually...
 |
| Explorer Kit |
Very interesting, I want to buy a kit from byoguitar.com as well.
ReplyDeleteDo you find the hardware better than that of your saga kit? Also, did you have to route the holes for the bridge and tailpiece yourself? I'm especially wary of that step.
I'd say the hardware is better than Saga, yes. Not anything fancy, but serviceable. I had planned to replace the tuners, but am in no hurry as they do the job OK to this point, same with the bridge.
ReplyDeleteAnd yes, the bridge and stop tail holes need to be drilled. It's not too hard to figure out where, but I strongly recommend ignoring the instructions and figuring it out yourself. Otherwise, there is a great risk of it not getting done correctly, as the instructions are incorrect and vague.
If you'd like I can do a post where I elaborate on how...