No photos yet, but I finish sanded the entire guitar after work last night. It felt good to sit outside in the sun with the orbital whirring away and working with a sanding block again. Only took a couple hours, started with 80, then 120, 150 and finally 220 grits.
After that, I rigged up a coat hanger device for one of the tuner holes and broke the seal on my Rockler tung oil and the can of mineral spririts I bought at Home Depot sunday. Made a 50/50 mixture in a plastic up, grabbed a small cheapo brush and started to apply the first generous coat of tung oil to the Gretsch (outside, naturally).
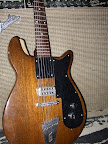
It really seemed to soak this up and the wood turned a absolutely gorgeous dark mahogany color. The grain really popped too. I was very pleased. I let it sit, soak (and runs drip) for about 15 minutes, then proceeded to wipe the excess off and rub the oil in with a clean, soft cotton rag. Took the guitar back inside and found a secure location to hang it up to cure till I have a chance to apply another coat (probably wednesday or thursday, as we jam tonight).
I'm curious to see how many coats it's going to be before I'm at a point I'm happy with the finish. Will I want more on the back of the neck then elsewhere? Be interesting to figure this out as I go along.
The templates for the headstock logo came over the weekend. They look great and should serve their purpose admirabley. I still need to hit the auto touch-up paint section of whatever store strikes my fancy and see if I can locate some lacquer that looks to be a suitable color.
Given the time difference between here and Washington, it's somewhat difficult to coordinate that phone call I wanted to put into TV Jones, so I thought I would try their info e-mail address first, just to see if I can get advice that way. I just sent this off an hour ago:
Hi,
I need to purchase a pickup for a guitar I am
refurbishing. Here are the specs:
1961 Gretsch Corvette
solid mahogany body and neck
one bridge pickup
trapeze tail piece
converted to tunomatic bridge (body drilled for studs,
so it's fixed)
I'll be buying what ever TV Jones pup in the Gretsch
style English mount (the guitar was routed for a
humbucker long ago).
Other Gretsch guitars I own:
2005 6120-DSW
2005 6118 (Filtertron Tennessee Rose)
2006 Electromatic Pro-Jet
I play mostly music in the realm of The White Stripes,
Social Distortion with the occasional rockabiliiy,
surf and blues style tunes thrown in.
In the past I have had hi output humbuckers in guitars
(like Duncan Distorion) and haven't cared much for
their versatillity and tone.
I'm thinking a PowerTron, but perhaps a PowerTron Plus
might be better?
Also, the route is about 3/4" to 7/8" deep, and I am
unsure if I need to specify the short pole piece
screws, or if that's deep enough to accomodate the
standard ones.
Thanks for any help you can provide. If it's better
that I call, I'd be happy to do it.
Thanks,
That's all for now....
Tuesday, July 31, 2007
Friday, July 27, 2007
The big plunge.
Success! I was able to use a drill press in a race shop here right after work. Tom's a great guy and many kudos to him for helping me out. Needless to say I spent about half the time there answering questions about what I had, what I was doing. They fully appreciated trying to save an old war horse, so to speak.
I had to eyeball lining up the bit, but I had everything marked up well and the pilot holes helped too. I went slow and double checked everything before actually drilling.
I'm going to imbed the photos in the page for this one....
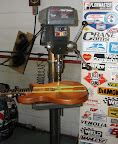
Here it is layed up on the drill press just before the big plunge:
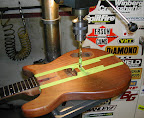
A close up:
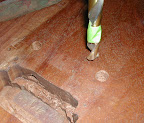
Didn't take long:
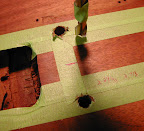
Checked the depth, A.O.K.....will check the spacing when I get home:
Twas a major decision to deface this poor old Corvette even further by drilling these bridge post holes...I agonized over it for a while, but in the end, I thought hotrodding it was the best thing to do:

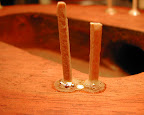
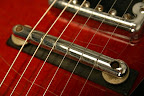
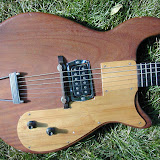
The spacing was OK, but just barely. I got the posts just a tad far apart, which actually will work to my advantage. Even though it's a Gotoh Tunomatic, it's still a tad sloppy on the posts. The fact that it drops on with a interference fit now is almost akin to having the more expensive (and less attractive) locking post version. I layed some strings on the nut and bridge (pulled taught) and the strings center on the neck exactly where I hoped they would. All in all I'm very pleased, and this will be the only operation I needed to do where I didn't have the tools or equipment I needed. It's back to all "in house" from here on out.
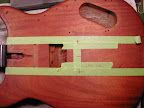
OK, so I wanted to play more than work last night. After whittling on some mahogany (man that block I have is hard stuff!), I decided it would be OK to forget the idea of plugging all the screw holes with finely crafted rods of hand carved mahogany...it would have taken weeks! So, out come the toothpicks and Gorilla glue...all these will be hidden by the pickguard and pickup ring anyway....
One last thing I did was to determine the exact position (ceneter to center mostly) of the Gretsch pickup ring and mark and drill pilot holes so I would know it's location after all the finishing is done.
The Gorilla glue cured over night and I used a razor blade to shave off the glue overflow and excess toothpick before I came into work this morning. I also block sanded each one flush with a tiny little sanding block I made. So, it's now ready for a full sanding and then I can start applying the tung oil. Definite progress is being made here! I also got the shipping notice for the headtsock stencils last night...so they'll be here in good time.
I had to eyeball lining up the bit, but I had everything marked up well and the pilot holes helped too. I went slow and double checked everything before actually drilling.
I'm going to imbed the photos in the page for this one....
Here it is layed up on the drill press just before the big plunge:
A close up:
Didn't take long:
Checked the depth, A.O.K.....will check the spacing when I get home:
Twas a major decision to deface this poor old Corvette even further by drilling these bridge post holes...I agonized over it for a while, but in the end, I thought hotrodding it was the best thing to do:
The spacing was OK, but just barely. I got the posts just a tad far apart, which actually will work to my advantage. Even though it's a Gotoh Tunomatic, it's still a tad sloppy on the posts. The fact that it drops on with a interference fit now is almost akin to having the more expensive (and less attractive) locking post version. I layed some strings on the nut and bridge (pulled taught) and the strings center on the neck exactly where I hoped they would. All in all I'm very pleased, and this will be the only operation I needed to do where I didn't have the tools or equipment I needed. It's back to all "in house" from here on out.
OK, so I wanted to play more than work last night. After whittling on some mahogany (man that block I have is hard stuff!), I decided it would be OK to forget the idea of plugging all the screw holes with finely crafted rods of hand carved mahogany...it would have taken weeks! So, out come the toothpicks and Gorilla glue...all these will be hidden by the pickguard and pickup ring anyway....
One last thing I did was to determine the exact position (ceneter to center mostly) of the Gretsch pickup ring and mark and drill pilot holes so I would know it's location after all the finishing is done.
The Gorilla glue cured over night and I used a razor blade to shave off the glue overflow and excess toothpick before I came into work this morning. I also block sanded each one flush with a tiny little sanding block I made. So, it's now ready for a full sanding and then I can start applying the tung oil. Definite progress is being made here! I also got the shipping notice for the headtsock stencils last night...so they'll be here in good time.
Thursday, July 26, 2007
Not much actually accomplished....
...but research and acquisitions the last few days.
I placed the order for the Gretsch logo template from best-decals.com last friday. I expect I'll see them in a couple days.
Meanwhile, this great pic of a 1962 Corvette headstock showed up on ebay today, and I can see some differences between the vintage waterslide decal and my artwork. Oh well...not gonna let it deter me, the one I drew up will still look OK.


I finally got my hands on some raw linseed oil to condition the fret board. I really like how this stuff looks and feels, and it gets Dan Erlewine's highest recommendation for rosewood (and I assume ebony).

Last weekend I went to Rockler and purchased a bottle of their pure tung oil to have on hand when it comes time to start finishing the body/neck. While there I also got some real hide glue to have on hand and a few "pen blanks" of rosewood and ebony. At the time I was entertaining the idea of carving my own floating bridge and base instead of using my Tunomatic. Those thoughts have passed.

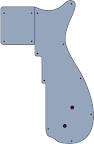
I also got the shape of the pickguard finalized and sent the drawing file off to terrapinguitars.com with payment for the new guard. Should be here in a couple three weeks. Clear plastic with a quarter round polished edge and painted silver on the backside.
I also got the exact bridge location worked out so I know where the holes have to be drilled for the bridge post bushings. I have drilled small pilot holes to aid when I finally find a drill press I can use, the buddy I was hoping to hit up for this has stuff going on and it doesn't look like I can fit into his schedule when I have the time free:
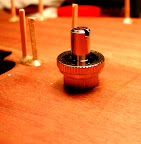
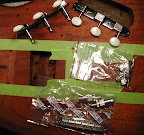
Here is a photo of the tuners and bridge that arrived from Stew Mac. It's nice they are close by in Ohio...I place an order for parts on a thursday and monday when I get home from work, there they are waiting for me.
Luckily, I walked down to the end of the row of racing shops on the other side of the parking lot from where I work (I work on Gasoline Alley in Indianapolis), and the guy said I could come over after I get off and use his drill press and the 3/16" and 7/16th inch bits I will need. Excellent! I had the forethought to bring the guitar with me today as well as a machinist rule, a roll of tape, my camera and the bridge studs. Sadly, I forgot to bring my good padded clamp, so I hope he has something I can utilize, or I can get by without clamping. Hooray!
I've been trying to make that decision on the pickup....

I know it needs to be an English Mount:
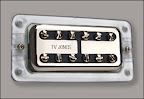
I'm leaning towards the Powertron Plus bridge pup....I think the extra mids will work with the Corvettes solid body to keep things from getting too brite. I really need to call and talk to them about it, but TV is away at NAMM for the weekend, so I'll probably wait to place the order till I can speak with him.
I'm not sure if I need ears, or not...or if I need the short pole piece screws or not...these are things I should discuss with them before I place the order. Plus, I need to decided if I want to do coil splitting....which would also require a different volme (or tone) pot than the one I've already bought. Plenty of time to get this all worked out...but when the trigger finally gets pulled, I'll be adding strap buttons, stickers, a t-shirt and a coffee mug to the order....gotta swag up!:)
Lastly, here are a couple pics I thought interesting. The first is what appears to be a stock 1962 Corvette bar bridge. This set-up looks like it would work on my `61 Corvette (meaning the action wouldn't be too high). Also, in talking about this project on the net, someone posted a pic of their modified 1961 Corvette. I thought it looks pretty damn cool, so I wanted to post it here.
I placed the order for the Gretsch logo template from best-decals.com last friday. I expect I'll see them in a couple days.
Meanwhile, this great pic of a 1962 Corvette headstock showed up on ebay today, and I can see some differences between the vintage waterslide decal and my artwork. Oh well...not gonna let it deter me, the one I drew up will still look OK.
I finally got my hands on some raw linseed oil to condition the fret board. I really like how this stuff looks and feels, and it gets Dan Erlewine's highest recommendation for rosewood (and I assume ebony).
Last weekend I went to Rockler and purchased a bottle of their pure tung oil to have on hand when it comes time to start finishing the body/neck. While there I also got some real hide glue to have on hand and a few "pen blanks" of rosewood and ebony. At the time I was entertaining the idea of carving my own floating bridge and base instead of using my Tunomatic. Those thoughts have passed.
I also got the shape of the pickguard finalized and sent the drawing file off to terrapinguitars.com with payment for the new guard. Should be here in a couple three weeks. Clear plastic with a quarter round polished edge and painted silver on the backside.
I also got the exact bridge location worked out so I know where the holes have to be drilled for the bridge post bushings. I have drilled small pilot holes to aid when I finally find a drill press I can use, the buddy I was hoping to hit up for this has stuff going on and it doesn't look like I can fit into his schedule when I have the time free:
Here is a photo of the tuners and bridge that arrived from Stew Mac. It's nice they are close by in Ohio...I place an order for parts on a thursday and monday when I get home from work, there they are waiting for me.
Luckily, I walked down to the end of the row of racing shops on the other side of the parking lot from where I work (I work on Gasoline Alley in Indianapolis), and the guy said I could come over after I get off and use his drill press and the 3/16" and 7/16th inch bits I will need. Excellent! I had the forethought to bring the guitar with me today as well as a machinist rule, a roll of tape, my camera and the bridge studs. Sadly, I forgot to bring my good padded clamp, so I hope he has something I can utilize, or I can get by without clamping. Hooray!
I've been trying to make that decision on the pickup....
I know it needs to be an English Mount:
I'm leaning towards the Powertron Plus bridge pup....I think the extra mids will work with the Corvettes solid body to keep things from getting too brite. I really need to call and talk to them about it, but TV is away at NAMM for the weekend, so I'll probably wait to place the order till I can speak with him.
I'm not sure if I need ears, or not...or if I need the short pole piece screws or not...these are things I should discuss with them before I place the order. Plus, I need to decided if I want to do coil splitting....which would also require a different volme (or tone) pot than the one I've already bought. Plenty of time to get this all worked out...but when the trigger finally gets pulled, I'll be adding strap buttons, stickers, a t-shirt and a coffee mug to the order....gotta swag up!:)
Lastly, here are a couple pics I thought interesting. The first is what appears to be a stock 1962 Corvette bar bridge. This set-up looks like it would work on my `61 Corvette (meaning the action wouldn't be too high). Also, in talking about this project on the net, someone posted a pic of their modified 1961 Corvette. I thought it looks pretty damn cool, so I wanted to post it here.
Friday, July 20, 2007
Bridge assessment
I didn't actually do much last night except ponder and experiment. Really, I had the place to myself and wanted to crank my Vox up and play loud and long...which I did. It was good! But onto the Gretsch...I sanded down the the epoxy patch on the treble side of the first fret. It came out well and the whole side of the fret board now feels smooth.
So, I temporarily installed the tail piece, original nut, tuners (what a joke they are) and a couple E strings. I wanted to get an idea what my bridge options really are. Here's what I found:
With no bridge and the strings resting on the frets I had about 5/32" between the top of the guitar and the strings about where the bridge would be.
With the original bridge installed it gave me around 3/32" action, which is great, but the original bridge is pretty much shot and the string spacing is too wide.
With a Bigsby aluminum rocker bridge, the action was a whopping 3/16"! Way too high for my taste. It could be machined down a bit, but the base is way too wide to work well with the original pickguard shape.
So, I then installed a Gibson Tunomatic and a couple rather thick thumbwheels to approximate the height one would sit at when installed and adjusted all the way down. The strings just layed on the frets....perfect! It also gave me the string spacing I was looking for. I like Tunomatics, especially for plam muting, and despite my hesitation in drilling holes in the guitar, I've decided that's exactly what I'm going to do.
After gathering this info, I made a list of the parts and pieces I still need to buy, as well as the major stuff I need to make:
To Buy:
Tuning pegs
Bridge
Headstock decal
Pickguard
Pickup and mounting hardware
Strap Buttons
Decide of a finish and procure same
Possible different control knobs
To make:
Pickguard template
Nut
Holes for bridge mounting bushings
Now, I got on the web and placed an order with Stew Mac (see below). I went with the Gotoh Tunomatic with inserts and studs. I reasoned this would be better than the old style with no bushings. If I ever wanted to take the guitar back to a floating bridge, the bridge base should cover any trace of the bushing holes, anyway. I had e-mailed Stew Mac previously to ascertain the origin of their three on a plate tuners, and found they are actually Gotoh as well. Worth the few bucks extra IMHO.
I had previously made a tracing of the body and original pickguard screw holes. I've gotten that scanned in today and will be working up a vector file in Illustrator that I can print and tweak till I get what I want. I've already been in touch with Terrapin Guitars (who have cut custom guards for me before) and have all those ducks lined up. It'll cost around $90 for exactly what I want.
I've also drawn up a close approximation of the old Gretsch logo decal used on these and have spoken to the people at http://www.best-decals.com and gotten artwork guidlines and a price quote for a paint mask. I'm gonna order a couple extras to have just in case and to, perhaps, aid a future restoration down the line. I suspect the original decals were more or less the same color as the ones Gibson uses (like on my Les Paul double cut faded), so I will custom mix some lacquer and airbrush that on using the template once the headtsock is smoothed and painted black. It's kind of a metallic gold.
This weekend I'll be seeing a budy of mine who is a machinist, and I'll discuss getting together with him at some point in the near future to drill the two holes I need for the bridge bushings. I'm tempted to go the old hand drill and two bubble levels method...which has worked for me in the past with the able assistance of my girl friend's keen eye....but I'm not sure I want to take that risk this time. We shall see.
So, that's pretty much it....the only decision left is what TV Jones pickup to put in it. Plenty of time to pull that trigger...
Stewart McDonald:
These items will ship tomorrow, Friday, July 20
Via: Standard shipping
Qty - Item# Description
1 - #4095 Vintage-style 3-on-Plate Tuners Nickel, 3L/3R $48.18
1 - #1511-N Gotoh Tune-o-matic Bridge with Studs/Bushings Nickel $21.75
 |
| Post truss rod repairs and refurb Part3 |
Thursday, July 19, 2007
The refret and other minor things....
Late night last night getting the refret done. Here's the photo album...I'l get wordy later...
Later the next day he adds:
Ok...take a few moments to discuss what happened on this round.
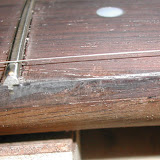
First order of business was to file down the epoxy overflow from the dot markers. Then I finished sanding down the fret board with my radiused sanding blocks. The long one is loaded with 100 grit, and the two short ones are loaded with 150 and 220 grit. I used some 320 grit for the final smoothing passes by hand. Sadly, for some reason I was getting a lot of chip out at the edges of the fret slots....dunno why this was, but I'll just have to live with it.
I contemplated frets for a while and finally decided to go with my Gibson frets. I like their size, liked the tangs and they just gave me an inexplicable warm fuzzy feeling. I have a Zona saw I got at a hobby shop that cuts a kerf that's damn near perfect for the tang on these frets. Cost me $7.95 I think. Zona makes great saws with lots of different kerfs (width of cut), and they're all inexpensive. Good hobby shops will carry most of the line, or will order what you want. Speaking of frets, fret slots and tangs...the original Gretsch frets had extremeley thin tangs....not sure where one would buy frets today that didn't require widing of the fret slots....unless you really needed to do some compression fretting, of course.
Also, I just want to mention...I don't do refrets a lot...so I don't own (nor have I made) a fret bender. But, both Gibson and Fender offer frets in various sizes and radii, so I've always just bought pre-cut and pre-bent frets from them. They work great and are not expensive.
OK, I widened and slightly deepened the slots and proceeded to pound frets in with my new fret hammer (way cool tool, BTW). Once they were all in I flowed a little water thin super glue into the undersides of each fret end to make sure they all stayed down where I wanted them. I don't have a pair of $30 fret cutters, but I do have a (cheap knockoff) Dremel with loads of cut-off wheels....so that's what I like to use to trim off the overhang. Fast and easy! Then I worked the ends down with my leveling file and got them beveled nicely.
Next was masking the board off (I like green tape for this....just because it looks neat) and proceeded to level the frets. Use a Sharpie on their tops so you know when to stop removing material! I also used my long radiused sanding block to make sure I had a nice 12" radius to the frets. The body horns got in the way of deepening the last two slots properly (that's my excuse anyway) so they ended up proud of the others and really needed to be knocked down a lot more. Dangit. Oh well, they'll still work just fine. I made sure I sanded a little bit more as I went down the board so there is a little drop off to the frets in the higher register...which I always like to do.
Once the leveling was done I recrowned everything with my cheap but functional 3 in one crowning file, then used my Stew Mac fret end file to tidy up and round off the fret ends. Lastly, I spent copious amounts of time polishing the frets back to near mirror like status with my MicroMesh sanding kit. It's tedious...but I really like the way the MicroMesh system works.
The next morning I got up a bit early so I could fix a bad spot on the side of the first fret area of the fingerboard. It had chipped out at some point and you could feel the fret end when you ran your hand up and down the neck. It really bugged me. So, I mixed up a bit of epoxy and dumped a whole pile of rosewood sanding dust in it, then applied some to the chipped out area. Then it was off to work!
Later the next day he adds:
Ok...take a few moments to discuss what happened on this round.
First order of business was to file down the epoxy overflow from the dot markers. Then I finished sanding down the fret board with my radiused sanding blocks. The long one is loaded with 100 grit, and the two short ones are loaded with 150 and 220 grit. I used some 320 grit for the final smoothing passes by hand. Sadly, for some reason I was getting a lot of chip out at the edges of the fret slots....dunno why this was, but I'll just have to live with it.
I contemplated frets for a while and finally decided to go with my Gibson frets. I like their size, liked the tangs and they just gave me an inexplicable warm fuzzy feeling. I have a Zona saw I got at a hobby shop that cuts a kerf that's damn near perfect for the tang on these frets. Cost me $7.95 I think. Zona makes great saws with lots of different kerfs (width of cut), and they're all inexpensive. Good hobby shops will carry most of the line, or will order what you want. Speaking of frets, fret slots and tangs...the original Gretsch frets had extremeley thin tangs....not sure where one would buy frets today that didn't require widing of the fret slots....unless you really needed to do some compression fretting, of course.
Also, I just want to mention...I don't do refrets a lot...so I don't own (nor have I made) a fret bender. But, both Gibson and Fender offer frets in various sizes and radii, so I've always just bought pre-cut and pre-bent frets from them. They work great and are not expensive.
OK, I widened and slightly deepened the slots and proceeded to pound frets in with my new fret hammer (way cool tool, BTW). Once they were all in I flowed a little water thin super glue into the undersides of each fret end to make sure they all stayed down where I wanted them. I don't have a pair of $30 fret cutters, but I do have a (cheap knockoff) Dremel with loads of cut-off wheels....so that's what I like to use to trim off the overhang. Fast and easy! Then I worked the ends down with my leveling file and got them beveled nicely.
Next was masking the board off (I like green tape for this....just because it looks neat) and proceeded to level the frets. Use a Sharpie on their tops so you know when to stop removing material! I also used my long radiused sanding block to make sure I had a nice 12" radius to the frets. The body horns got in the way of deepening the last two slots properly (that's my excuse anyway) so they ended up proud of the others and really needed to be knocked down a lot more. Dangit. Oh well, they'll still work just fine. I made sure I sanded a little bit more as I went down the board so there is a little drop off to the frets in the higher register...which I always like to do.
Once the leveling was done I recrowned everything with my cheap but functional 3 in one crowning file, then used my Stew Mac fret end file to tidy up and round off the fret ends. Lastly, I spent copious amounts of time polishing the frets back to near mirror like status with my MicroMesh sanding kit. It's tedious...but I really like the way the MicroMesh system works.
The next morning I got up a bit early so I could fix a bad spot on the side of the first fret area of the fingerboard. It had chipped out at some point and you could feel the fret end when you ran your hand up and down the neck. It really bugged me. So, I mixed up a bit of epoxy and dumped a whole pile of rosewood sanding dust in it, then applied some to the chipped out area. Then it was off to work!
 |
| Post truss rod repairs and refurb Part2 |
Wednesday, July 18, 2007
Refurbing the fret board and replacing dot markers
Well, the Gretsch sat all clamped up over the long weekend I was away at the Pitchfork Music Fetsival. The Stewart McDonald order arrived during the day, so I was all set to get back on it. Once home from work last night, I unclamped everything, inspected it and was pleased with the results. The fret board was positioned correctly fore and aft and it was centered just right on the neck. It also had gone back down well with tight joints along all edges. I borrowed the truss rod wrench from my Gibson faded LPDC, and using a straight edge, got the neck as straight and true as I could given the condition of the fret board. It only took tightening the truss rod nut down snug then another approximately half a turn to get it where I was happy.
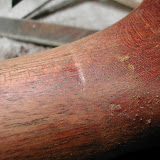
Previously, when I glued & clamped the strip of wood holding the truss rod in, I did a stupid thing. I clamped it up without using any protective wood strips on the back of the neck. Obviosly, this left some indentations that you could feel with your fretting hand. Ugh. There were also a few other small dings on the back of the neck this old girl had picked up along the way. Fortunately, there was a way to almost totally reverse this damage. I plugged my 35watt soldering iron in and let it get good and hot. Then I dipped a old cotton rag in some water and got it good and damp....not dripping wet, but well dampened with water. I layed a small bit of the wet rag ontop of one of the dents and applied the soldering iron. This creates a little pocket of steam, which swells the wood underneath and brings the dent almost completely out. Sometimes it takes two or three applications, but I managed to get all the damage I did reversed and quite a bit of the older dents as well. Pretty much everything that's left is minor and will not trouble me.
I had stopped by Lowes after work to get some epoxy and some double sided carpet tape, so I put some of the tape on my 12" radius sanding block loaded it with some 120 grit 3M oxide and started smoothing everything down. I had to sand quite a bit to get most of the marks out of the fret board that a previous owner had gouged in when they ground down the frets, I wish I knew what they were thinking when they did this...it was a prime example of a "hack job". Rosewood makes a lot of fine dust when sanded and it's turning everything around my bench a dark brown...including my jeans!
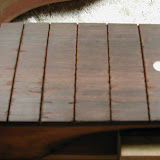
I cleaned out the old dot marker holes and test fitted both sizes of dots I'd gotten from StewMac. The smaller were obviously the way to go...they were ever so slightly smaller than the originals, which I figured would be OK as the small gap would be filled with the epoxy I was going to glue them in with. The larger of the side dot material I bought was the way to go there, as it was essentially exactly the same size as the old stuff.
I had to make small plastic spacers to go under the new dot position markers so they would sit at the proper height. I wanted them slightly proud of the fret board surface so they could be sanded down smooth to match the contour of the board. I made them by slicing some thin pieces off a length of Evergreen plastic tubing that is smaller diameter than the dots. I sanded these on a sanding stick to tailor each one to the proper thickness. Then I loaded the holes with epoxy and inserted the spacers and dots. The side dots are easier to deal with. I cleaned out the holes with the proper size drill, cut some lengths of the plastic rod, loaded the holes with some superglue and slid the rod bits in.
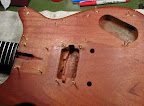
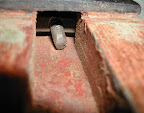
While the epoxy set up, I cut a piece off the mahogany tail block I bought and proceeded to whittle plugs for the rather large hole that had been created in the bottom of the guitar from the strap button being torn out at some point in the past. I wanted to match wood types and make a solid base for redrilling the strap button hole at a later point. The tail piece hides all this work. In the photos you can see the first plug I carved, which was subsequently glued with Gorilla glue and clamped to sit overnight. There is a hole or channel drilled from the control cavity to this location that must be kept open for the ground wire that grounds the tail piece and thereby the strings. This morning I carved one more small piece and glued it in with superglue. I want to inspect everything before I bother to fill the hole anymore, but will make sure I take photos of the final product to show what I was doing.
I also had a few moments to file down two of the new marker dots and epoxy overflow. It went well and won't take long to finish. Once they are all smoothed down, I can do the final sanding on the fret board and strat preparring for the refret.
I also took some time to measure..approximately...how much room I'm going to have for the bridge, as the neck angle on this old Gretsch is pretty shallow. The original bridge is pretty hacked up and I'm not sure is saveable. It's a simple rosewood base with two threaded posts, two thumb wheels and a rosewood arch to support the strings. There are photos of it in the first gallery. There will be only around 9/16th of an inch in height to work with if I want low action (and I want that possibility), so it limits my options quite a bit. I have a aluminum Bigsby rocker bridge and base I think I can make work. I could try to repair or replicate the original and forget about intonation adjustment. or I'm debating the idea of drilling two holes for stud bushings and installing a Tuneomatic. That's the most invasive option and somewhat "unGretschy" as well....but I very much like the idea of a fixed bridge. Not having a drill press would make drilling the bushing holes a pain though. I may have access to one through a friend...I've got to find out if that's a possibility.....and weigh my options...and do some research....
Anyway, here are some photos of the work....
Previously, when I glued & clamped the strip of wood holding the truss rod in, I did a stupid thing. I clamped it up without using any protective wood strips on the back of the neck. Obviosly, this left some indentations that you could feel with your fretting hand. Ugh. There were also a few other small dings on the back of the neck this old girl had picked up along the way. Fortunately, there was a way to almost totally reverse this damage. I plugged my 35watt soldering iron in and let it get good and hot. Then I dipped a old cotton rag in some water and got it good and damp....not dripping wet, but well dampened with water. I layed a small bit of the wet rag ontop of one of the dents and applied the soldering iron. This creates a little pocket of steam, which swells the wood underneath and brings the dent almost completely out. Sometimes it takes two or three applications, but I managed to get all the damage I did reversed and quite a bit of the older dents as well. Pretty much everything that's left is minor and will not trouble me.
I had stopped by Lowes after work to get some epoxy and some double sided carpet tape, so I put some of the tape on my 12" radius sanding block loaded it with some 120 grit 3M oxide and started smoothing everything down. I had to sand quite a bit to get most of the marks out of the fret board that a previous owner had gouged in when they ground down the frets, I wish I knew what they were thinking when they did this...it was a prime example of a "hack job". Rosewood makes a lot of fine dust when sanded and it's turning everything around my bench a dark brown...including my jeans!
I cleaned out the old dot marker holes and test fitted both sizes of dots I'd gotten from StewMac. The smaller were obviously the way to go...they were ever so slightly smaller than the originals, which I figured would be OK as the small gap would be filled with the epoxy I was going to glue them in with. The larger of the side dot material I bought was the way to go there, as it was essentially exactly the same size as the old stuff.
I had to make small plastic spacers to go under the new dot position markers so they would sit at the proper height. I wanted them slightly proud of the fret board surface so they could be sanded down smooth to match the contour of the board. I made them by slicing some thin pieces off a length of Evergreen plastic tubing that is smaller diameter than the dots. I sanded these on a sanding stick to tailor each one to the proper thickness. Then I loaded the holes with epoxy and inserted the spacers and dots. The side dots are easier to deal with. I cleaned out the holes with the proper size drill, cut some lengths of the plastic rod, loaded the holes with some superglue and slid the rod bits in.
While the epoxy set up, I cut a piece off the mahogany tail block I bought and proceeded to whittle plugs for the rather large hole that had been created in the bottom of the guitar from the strap button being torn out at some point in the past. I wanted to match wood types and make a solid base for redrilling the strap button hole at a later point. The tail piece hides all this work. In the photos you can see the first plug I carved, which was subsequently glued with Gorilla glue and clamped to sit overnight. There is a hole or channel drilled from the control cavity to this location that must be kept open for the ground wire that grounds the tail piece and thereby the strings. This morning I carved one more small piece and glued it in with superglue. I want to inspect everything before I bother to fill the hole anymore, but will make sure I take photos of the final product to show what I was doing.
I also had a few moments to file down two of the new marker dots and epoxy overflow. It went well and won't take long to finish. Once they are all smoothed down, I can do the final sanding on the fret board and strat preparring for the refret.
I also took some time to measure..approximately...how much room I'm going to have for the bridge, as the neck angle on this old Gretsch is pretty shallow. The original bridge is pretty hacked up and I'm not sure is saveable. It's a simple rosewood base with two threaded posts, two thumb wheels and a rosewood arch to support the strings. There are photos of it in the first gallery. There will be only around 9/16th of an inch in height to work with if I want low action (and I want that possibility), so it limits my options quite a bit. I have a aluminum Bigsby rocker bridge and base I think I can make work. I could try to repair or replicate the original and forget about intonation adjustment. or I'm debating the idea of drilling two holes for stud bushings and installing a Tuneomatic. That's the most invasive option and somewhat "unGretschy" as well....but I very much like the idea of a fixed bridge. Not having a drill press would make drilling the bushing holes a pain though. I may have access to one through a friend...I've got to find out if that's a possibility.....and weigh my options...and do some research....
Anyway, here are some photos of the work....
 |
| Post truss rod repairs and refurb |
Thursday, July 12, 2007
Onward!
Given everything turned out so well last night, I placed an order for the following from Stew Mac this morning:
4895 1 Fretting Hammer - Hammer with plastic and brass faces $17.45
0002 12 Pearl Dots - 5mm (13/64") dia. $0.58 $6.96
0003 12 Pearl Dots - 6mm (15/64") dia. $0.60 $7.20
4479 1 Neck Support Caul $10.44
0483 1 Plastic Side Dot Material - White, 1/16" diameter $1.09
1358 1 Plastic Side Dot Material - White, 3/32" diameter $1.09
1136 1 Acoustic Guitar Tailblock - For Dreadnought $8.98
0044 1 Bridge Pin Puller $1.96
6010-V 2 Vintage Bone Nuts - Gibson-style blank $4.78 $9.56
Some of this is for the Gretsch, some other projects, some tools I've been meaning to order for months. I was unsure of the position makrer size I needed, but they're cheap so I ordered what I knew I could make work one way or the other.
The Tailblock was the easiest way for me to procure a hunk of mahogany I can carve up and use to plug some holes in the Gretsch body (like for the strap pegs). All will become clear as the project progresses.
The last thing I got accomplished...at the expense of some guitar playing time before work this morning, was to de-fret the neck and get everything re-clamped. Pictures of the old frets can be seen in the prveious entries photo gallery. Getting the old frets out was a challenge, but not too difficult. I used the pointed awl to tap on the tangs from the edge and get a good start going that I could then grab with the fret puller...a great tool, BTW. Heating frets with a soldering iron makes the process go so much more quickly and cleanly too.
Looking forward to my long anniversary weekend in Chicago at Pitchfork, and now I also have something to look forward to when I return...the Stew Mac order will be here and I can proceed with the "refurboration"!
Wednesday, July 11, 2007
Superfast
So much has happened in the last 24 hours. Got home from work and finished dinner by about 6:30. At 6:45, I had everything layed out to start on the truss rod repair. I'm leaving town friday morning for the Pitchfork festival in Chicago, so I pretty much only had wednesday night to fiddle with this till I get back. I figured if I got the fret board off, I'd be happy. Well...shortly before 8:00PM I had:
1) The fret board off
2) The strip of wood holding the truss rod in...out
3) The truss rod removed, straightened and re-threaded
4) The various bits and pieces cleaned up and ready for reassembly
I was astounded! It only took 30 minutes to actually completely remove the fret board. Much, much easier than I anticipated.
I decided, since I did not have the proper tools to make the new truss rod fit (I was going to hit a friend up for that), that I would see what I could do with the old one. Well, using the die, a shitty old vice in the garage, a hammer and some ingenuity I was able to get the old one usable, so I just stuck with it. All I needed in the end was the washer and brass nut.
A quick run to Lowes before they closed produced five c-clamps, a strip of wood for distributing the clamping force, some sandpaper, a glue brush and a few other small odds and ends. I then proceeded to get it all back together.
Now, my original intention was to use the pellet style of hide glue to reassemble all this....but I did not have any, nor could I get any locally last night. I did have a bottle of the liquid hide glue that I got from Stew Mac, and after some research and consideration, I decided it was perfectly fine to use in this application. At least I hope so. It's reversible, if not...
I got the truss rod reinstalled, and then glued in the wood retaining strip, clamped it up and let it sit for about 45 minutes. That's how long the glue bottle said was needed for initial set-up. While waiting for that, I cleaned up the fretboard mating surface and did a few other things to ready for the process of regluing the fretboard down.
I probably started the whole process about 9PM...maybe 9:30PM. I wasn't done till around 11PM. It took a long while to get the glue spread, get the fretboard down, clamped and positioned exactly where I wanted it. Then there was the clean-up of the glue that had squeezed out. It was a messy deal and I found myself running to the sink many times to wash glue off my hands. After much fiddling, I wa shappy with the fretboard placememtn and clamping, so I set the guitar aside, cleaned up and played guitar for a bit before I hit the sack.
It's a good thing I had and used some wax paper to protect the clamping cauls and neck wood while I was gluing up the fretboard. I knew I needn't worry about inadvertently gluing anything together that shouldn't have been.
Sadly, all the original position markers, both neck edge and fretboard. were ruined in the process of steaming/heating the board off. I shall need to replace them and wonder what I could have done differently that would have prevented that.
Here's a link to the album of the process:
 |
| Gretsch Truss Rod Repair |
Tuesday, July 10, 2007
Parts and tools are in...
...at least some of what I'll need. My Stew Mac order came as well as the two 500k split shaft CTS pots and the two packs of fret wire I ordered from a different dealer.
I got some Gibson fret wire and some Fender American standard jumbo fret wire. This saves me having to bend it myself, since both come precurved at 12" radius. I'm eventually gonna pull a fret from the Gretsch and measure the tang to give me an idea what size the fret slots are. I already have a saw that will work for the Fender wire, but have't gotten into the Gibson wire enough to know yet.
I was thinking I should have ordered one of those neck cradels from S-M, but of course...the thought cxame to me hours after the order actually shipped. I doubt it's really necessary anyway.
As for working with the ebay seller...bag that idea. She got very defensive and accusitory very quickly and refused to own up to what her husband did to screw up the truss rod. After over 600 great experiences buying and selling on ebay, I finall got burned. Oh well, hopefull I'll be able to make something good come out of this whole deal.
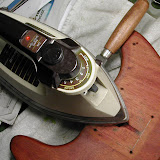
Now...I need to lay my hands on a clothing iron (gonna hit the Salvation Army and Goodwill first) as well as some sort of apparatus to heat the hide glue when it comes time to glue the fret board back down. I'm thinking some sort of old fashioned coffee pot of crock pot might work for this...I'll have my eye out when surfing the second hand shops.
I'll try to add some pics of what has come in over the next couple days....
I got some Gibson fret wire and some Fender American standard jumbo fret wire. This saves me having to bend it myself, since both come precurved at 12" radius. I'm eventually gonna pull a fret from the Gretsch and measure the tang to give me an idea what size the fret slots are. I already have a saw that will work for the Fender wire, but have't gotten into the Gibson wire enough to know yet.
I was thinking I should have ordered one of those neck cradels from S-M, but of course...the thought cxame to me hours after the order actually shipped. I doubt it's really necessary anyway.
As for working with the ebay seller...bag that idea. She got very defensive and accusitory very quickly and refused to own up to what her husband did to screw up the truss rod. After over 600 great experiences buying and selling on ebay, I finall got burned. Oh well, hopefull I'll be able to make something good come out of this whole deal.
Now...I need to lay my hands on a clothing iron (gonna hit the Salvation Army and Goodwill first) as well as some sort of apparatus to heat the hide glue when it comes time to glue the fret board back down. I'm thinking some sort of old fashioned coffee pot of crock pot might work for this...I'll have my eye out when surfing the second hand shops.
I'll try to add some pics of what has come in over the next couple days....
Thursday, July 5, 2007
Ouch...
...just got off the phone with a local luthier who has the guitar in hand and was discussing the truss rod issue with me. He estimates $250-$300 for removing the board, replacing the rod and gluing the board back down.
More than fair and also more than what I want to spend.
We discussed my previous amature luthier experience and he encouraged me to give it a go myself. We talked tools, techniques and what not. He seemed pretty positive I should be able to handle it without too much trouble. Really, that was above and beyond on his part, and I thanked him heartily.
In the course of my research, this was interesting to read:
http://www.projectguitar.com/tut/removal.htm
Edit to add later in the day.....
Just placed the first order with StewMac...talk about being optimistic:
0417 - 8" Wooden Radius-sanding Blocks - 12" radius - $15.95
4465 - Seam Separation Knife - $8.20
0412 - 4" Wooden Radius-sanding Blocks - 12" radius (Quantity 2 @ $10.80) - $21.60
0968 - Traditional Truss Rod Kit - 24" x 3/16" - $10.11
4058 - Thread Cutting Die - 10-32 thread - $4.99
0652 - Franklin Liquid Hide Glue - $9.15
1637 - Fret Pullers - $26.45
Wednesday, July 4, 2007
The adventure begins...
...or misadventure....as it may just turn out to be. First off, let's establish a little time line of events thus far:
Tuesday June 19: ebay auction won w/ BIN, invoiced and paid for ($380 with shipping)
Friday June 22nd: They actually ackowledged me with a electronic shipping notice
Tuesday July 3rd: it finally arrived.
Ugh. Lots of work to bring this Corvette back from near death. All was fine (and as expected) till I saw the damaged truss rod.
Here's a link to the whole album as it arived and was torn down & inspected. Eventually I figure out how to imbed these:
So...talking it over with seller, documenting problem, researching options locally and on the net. Good chance it'll get solved with a sharpened butter knife and a steam iron...
More soon
Tuesday June 19: ebay auction won w/ BIN, invoiced and paid for ($380 with shipping)
Friday June 22nd: They actually ackowledged me with a electronic shipping notice
Tuesday July 3rd: it finally arrived.
Ugh. Lots of work to bring this Corvette back from near death. All was fine (and as expected) till I saw the damaged truss rod.
Here's a link to the whole album as it arived and was torn down & inspected. Eventually I figure out how to imbed these:
 |
| `61 Corvette arrives and teardown 7/4/07 3:25 PM |
So...talking it over with seller, documenting problem, researching options locally and on the net. Good chance it'll get solved with a sharpened butter knife and a steam iron...
More soon
Subscribe to:
Comments (Atom)