Previously, when I glued & clamped the strip of wood holding the truss rod in, I did a stupid thing. I clamped it up without using any protective wood strips on the back of the neck. Obviosly, this left some indentations that you could feel with your fretting hand. Ugh. There were also a few other small dings on the back of the neck this old girl had picked up along the way. Fortunately, there was a way to almost totally reverse this damage. I plugged my 35watt soldering iron in and let it get good and hot. Then I dipped a old cotton rag in some water and got it good and damp....not dripping wet, but well dampened with water. I layed a small bit of the wet rag ontop of one of the dents and applied the soldering iron. This creates a little pocket of steam, which swells the wood underneath and brings the dent almost completely out. Sometimes it takes two or three applications, but I managed to get all the damage I did reversed and quite a bit of the older dents as well. Pretty much everything that's left is minor and will not trouble me.
I had stopped by Lowes after work to get some epoxy and some double sided carpet tape, so I put some of the tape on my 12" radius sanding block loaded it with some 120 grit 3M oxide and started smoothing everything down. I had to sand quite a bit to get most of the marks out of the fret board that a previous owner had gouged in when they ground down the frets, I wish I knew what they were thinking when they did this...it was a prime example of a "hack job". Rosewood makes a lot of fine dust when sanded and it's turning everything around my bench a dark brown...including my jeans!
I cleaned out the old dot marker holes and test fitted both sizes of dots I'd gotten from StewMac. The smaller were obviously the way to go...they were ever so slightly smaller than the originals, which I figured would be OK as the small gap would be filled with the epoxy I was going to glue them in with. The larger of the side dot material I bought was the way to go there, as it was essentially exactly the same size as the old stuff.
I had to make small plastic spacers to go under the new dot position markers so they would sit at the proper height. I wanted them slightly proud of the fret board surface so they could be sanded down smooth to match the contour of the board. I made them by slicing some thin pieces off a length of Evergreen plastic tubing that is smaller diameter than the dots. I sanded these on a sanding stick to tailor each one to the proper thickness. Then I loaded the holes with epoxy and inserted the spacers and dots. The side dots are easier to deal with. I cleaned out the holes with the proper size drill, cut some lengths of the plastic rod, loaded the holes with some superglue and slid the rod bits in.
While the epoxy set up, I cut a piece off the mahogany tail block I bought and proceeded to whittle plugs for the rather large hole that had been created in the bottom of the guitar from the strap button being torn out at some point in the past. I wanted to match wood types and make a solid base for redrilling the strap button hole at a later point. The tail piece hides all this work. In the photos you can see the first plug I carved, which was subsequently glued with Gorilla glue and clamped to sit overnight. There is a hole or channel drilled from the control cavity to this location that must be kept open for the ground wire that grounds the tail piece and thereby the strings. This morning I carved one more small piece and glued it in with superglue. I want to inspect everything before I bother to fill the hole anymore, but will make sure I take photos of the final product to show what I was doing.
I also had a few moments to file down two of the new marker dots and epoxy overflow. It went well and won't take long to finish. Once they are all smoothed down, I can do the final sanding on the fret board and strat preparring for the refret.
I also took some time to measure..approximately...how much room I'm going to have for the bridge, as the neck angle on this old Gretsch is pretty shallow. The original bridge is pretty hacked up and I'm not sure is saveable. It's a simple rosewood base with two threaded posts, two thumb wheels and a rosewood arch to support the strings. There are photos of it in the first gallery. There will be only around 9/16th of an inch in height to work with if I want low action (and I want that possibility), so it limits my options quite a bit. I have a aluminum Bigsby rocker bridge and base I think I can make work. I could try to repair or replicate the original and forget about intonation adjustment. or I'm debating the idea of drilling two holes for stud bushings and installing a Tuneomatic. That's the most invasive option and somewhat "unGretschy" as well....but I very much like the idea of a fixed bridge. Not having a drill press would make drilling the bushing holes a pain though. I may have access to one through a friend...I've got to find out if that's a possibility.....and weigh my options...and do some research....
Anyway, here are some photos of the work....
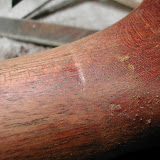 |
| Post truss rod repairs and refurb |
No comments:
Post a Comment