Friday, December 11, 2009

ZZZZZZZAAAPPPP!!!!!

Yup, my first time getting zapped. Luckily, it was very mild. I've been working on my Silvertone 1484 head. I had drained the caps, but disconnected the drain resistor and the main filter caps had built back up a little charge...which I found when I was probing around the choke to make some changes to the standby switch. Little tiny spark and a very small jolt....but it was still memorable in that it scared me. I suspect if it was the old original Atomics in there I would have been OK, but they where brand new eletrolytics I'd gotten from Weber, so they where fresh and eager to do their job. Trying to remember to keep the drain resistor hooked up when working on my amps now....

So, yeah....I'd put together a project list at Mouser for the 1484 head (number 1) that consisted of every resistor and capacitor. It would've come to a bit over $100 if I'd pulled that trigger. One day I was looking at Weber's site....and saw they carried resistors and capacitors. Hmm...so I put together an order for everything and it came to less than $40! Trigger pulled!

The parts came in over last weekend, so this week I've been digging in the Silvertone. Let me tell you. working on a point to point terminal strip amp is a major bitch. I was trying to properly desolder and remove all the components I wanted to replace, but there are times I just had to cut leads and find a way to make a good connection on the terminal strip. I also ended up needing to splice wires a number of times to extend them, versus completely replacing the wire. Not pretty, not the absolute best lead dress, but it worked.

I'm not done with the 1484 yet, but making good progress. All the electrolytics are new. New power cord, ground switch dissabled. Some of the crappy ceramic disc caps swapped for polyesters. Slowly going through and checking resistors. Best part is, I test my work from time to time and it's all good thus far. I still have some caps I want to replace, and a lot of resistors to check, but it's sounding great and the reverb and tremolo are working...as well as can be expected anyway.

One major thing I did was to change the standby switch to a Fender style. The original was just strange in that it shorted the phase inverter together. I moved it to right before the choke, much like most Fender amps. Much better, IMHO. Screwed up initially though...I disconnected the wires from the standby switch and, without thinking, spliced them together before moving on to changing the switch over. I had done this along with a number of other things, and when I fired the amp up it wasn't working properly.....very, very low output, almost none at all. Uh-oh...

I checked everything over twice and checked all solder joints...and couldn't figure out what was going on. It sounded familiar, just like it did before the standby switch change when the amp was on standby, actually. I remembered this and did some googling....and realized I should have just removed the old standby switch wires, not splice them together...because in doing so I hard wired the damn amp into permanent standby! Ha! It was late....give me a break.

Anyway, I've created a album with some photos....and here's a link showing my revised schematic...changes noted in red, components R&R'd or revised (thus far) highlighted in yellow..I will update this as I do more. Tremolo circuit next!

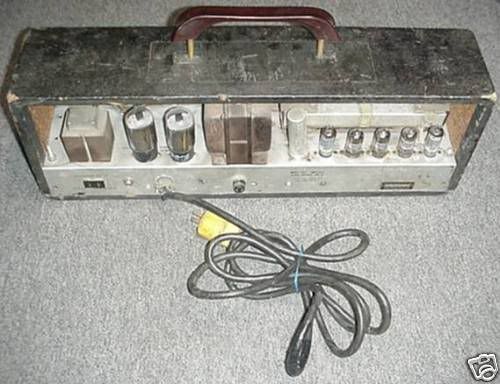
From Silvertone 1484 #1

Wednesday, December 2, 2009

A lucky Bassman Ten owner!

It's been a long road, but I think I've just about finished working on my Bassman Ten. It's been a real learning experience!

I noticed, over the last couple months, it just wasn't as loud as it should be, or as I remembered it when I first got it. So last weekend I decided to try to figure out the overall health and finish up any maintenance it needed.

I started by pulling the chassis and taking voltage readings everywhere. I had located a recently redrawn schematic where you could clearly read all component values and voltage levels. Everything was within the Fender specified +/- 20%.

So I hooked up my Weber Biasrite to check the bias voltage and current and was very surprised to find .6mA on one powertube and 12mA on the other. It should be closer to 30 to 40 mA! It didn't seem loud because it was only making around 7 watts from 2 6L6 tubes!

Turns out the screen grid resistors had gone open. Some idiot had used 1/4 watt resistors in place of 1 watt resistors and the heat had caused them to go open! That idiot was me, apparently, but I honestly don't remember doing it and don't know why I did! I was very lucky they didn't short. It might have fried my brand new Weber output transformer I think, or at least the new JJ tubes in there.

So I replaced those (with 2 watt metal films), a few other resistors and finished swapping out all the electrolytics. I kept stock values on everything except the cathode bias bypass capacitor which sets the bias level of the second half of both preamp tubes. It was 5µF stock and I upped it to 22µF (62 volts).

I finally removed the death cap and put in a new power cord too. Someone had installed a grounded cord a long time ago, but never disabled the ground switch and removed the death cap. That's all done now. If there's anything left to do, it's swap out all the old diodes. I'm gonna ask around and find out opinions on that. They're around 30 years old now and I wonder about them holding up.

I should also check every carbon comp resistor I've got left to see if they've drifted too far, but I'm in no huge hurry for this because it sounds great, the voltages look good and I have no excess hum or noise. All the critical ones in the power section are new metal films, as well as a few others here and there.

This is really a very cool amp. It's pretty unique among Fenders. Channel two is voiced very close to a AB165 Bassman, Channel one seems to be pretty unique voicing (much darker than two) and the overall topology is close to a Bandmaster without Vibrato. Basically, it lacks the third 12AX7 gain recovery stage of a Bassman (and many others) before going into the 12AT7 phase inverter. Take the vibrato circuit (and tube) out of a Bandmaster and you have the same overall thing.

It's not a loud amp, especially given the two 6L6 tubes, and with the bias being fixed kind of cold, it's only pushing about 32 watts right now. The tubes should last a good long time. I may, at some point, convert it to adjustable bias and work those tubes a little harder, but I'm in no hurry. I think it makes a great rock amp as is...jumper the channels and you get rich distortion at reasonable volume levels. It's kind of difficult to describe the sound, but if you read up on the Bassman Ten around the net, you'll see most agree it sounds great and absolutely unique among Fender amps.

I'll eventually flesh out my blogger photo folder for it, but for now here's one overall shot (notice it's a head now, not the typical 4X10 combo), and a link to my photobucket account for it...

From Bassman Ten


I'm going to try to recount a list of everything I've done to this pawnshop prize here...

All electrolytics replaced
power cord replaced/ground switch dissabled
new tubes and bias balance set
all new screen grid resistors and power rail dropping resistors
new speaker output jack
new output transformer with only 8 ohm tap used
new head cab
negative feedback resistor upped to 1.2k (I think, it was upped anyway)
all mods from previous owners reversed or eliminated

There are a few I may have missed and a few more (like diodes and maybe adjustable negative feedback) that I may yet do.

All in all...very cool project!

Thursday, October 15, 2009

Adventures in amp land

So it's been amp fest for me this week. Two and a half nights of playing my fingers off and annoying the neighbors.

I started out with the Peavey Triumph 60 and 1975 Fender Bassman Ten, one stacked on the other and both running hooked into my Marshall 4X10 (1965B).

That Triumph doesn't have what I'd call Fender cleans, but it's still pretty damn nice. Being able to switch between three channels is awfully fucking cool. Loves pedals, the crunch channel is quite versatile and dialable and the ultra channel is more gain than I typically use...which is great fun. Really glad I have this to fool around with, especially at the price I got it for.

The Bassman is simply not as loud as it should be. Given it has 2 6L6 tubes. I got to looking into that here at work and at home and figured out the replacement transformer is a 4ohm tap (only). So, all this time it's been running as a (more or less) 20 watt amp. No wonder! I don't have a cab wired for 4 ohms at the moment, and am thinking of getting a new Weber output tranformer for it. They're around $60 and would have 4 and 8 ohm taps (and maybe a 16 too).

My Cool Cat Drive came in and I've been messing with it the last two nights. It's pretty damn noisy with the Bassman, but quiet with everything else.(head scratcher) Regardless, I like it a lot and it's interesting to turn the gain all the way down, the volume all the way up and use it as a clean boost. I have a Transparent Overdrive (first gen.) on the way and am really looking forward to A/B them in that mode. Lots of gain on tap too if you push up the "Drive".

Then, last night I dug out my spare Silvertone 1484 head. It worked last time I played it a few months ago, but didn't seem loud enough then and I was nervous about a number of things. I've since found out the output transformer has a second tap at 8ohms that can be hooked up. I did that, replaced the kinda broken speaker jack and then put a better three prong power cord on it. It's as loud as it should be since the output and speaker cab impedances match up now.

I'd seen that Weber sells a replacement output transformer for these too and it's not very expensive, so I figured I might as well have some fun playing it till I get a chance to clean and do some recap work on it. If I blow something, it won't be a huge deal to fix it.

It was really acting up last night though and was making lots of scary noises...so I figured I'd fucked up somewhere or age and dirt finally got the best of it. In an attempt to start trouble shooting, I grabbed a chopstick and began whacking tubes to see what would happen. Damn...V1, the first gain stage 12AX7, made a shit ton of noise when I tapped it. It'd gone microphonic in a big way. No idea what kind of tube it is, can't see any markings, but all the others are original Silvertone tubes. I yanked it out and stuck a ElectroHarmonix in there I had laying around. Ding,ding,ding! No more noise at all!

God I love these (Twin Twelve) amps. I really like having a spare at home I can test pedals and guitars with. It's not exactly like my gigging amp, in part because I'm running it through the Celestion G10L-35 speakers instead of the old Jensens, which I think are much less efficient. I can hear the lack of speaker breakup at home. I also figured out my Vox footswitch will work with the Silvertone to turn the tremelo and reverb on and off. The reverb doesn't function on either one at the moment, but the trem does and sounds awesome! I'll have to come up with another footswitch I can add to my gigging equipment as I want to have one to use at home too. It's just a standard two button, stereo jack footswitch, lots of people make them.

This morning I ran my `74 Champ for a bit. It was acting up last week and I hadn't looked into why yet. It was acting up again this morning. Volume drops, sputtering, noise....I thought I'd try a new preamp tube since it still has the original. That didn't do anything....but while I was testing it, I heard some louder pops and cracks and noticed some faint wiffs of smoke coming from the input jacks! Holy SHIT!

I shut it down and pulled the chassis and took a look around. They place I bought it from had done some maintenance on it and in replacing the volume pot had done a shitty job soldering the lead to the input pin on V1. It looks like it's been variously shorting out and grounding out. I'll fix that next week and see if it corrects the problem. It had been working (and sounding) like a charm before this so I hope it's not too drastic. While in there I noticed it could use a retensioning of the tube sockets as well...

Here's a shot of the back of the Silvertone from the auction listing:

Monday, October 12, 2009

That's more like it.

I think it was three weeks ago now that I finished the `66 Corvette, but it may have just been two. I took a couple days to sand and polish the finish out. I started with 800 wet/dry and progressed through 1000, 1200, 1500 and finally 2000. I like using mineral spirits for the lubricant instead of water. Then I used my buffer with Maquires #1 & #2 polish it to a final shine. I'm very pleased with how this one came out, it has a great shine, the finish is quite thin and I have no sand throughs or significant flaws.

The pots and switch are new (CTS and Switchcraft), it's fitted with a treble bleed circuit and a TV Jones Powertron Plus. I kept the old guard and Grover tuners, but cut a new nut from bone. The bridge, of course, is the replacement Gotoh. It intonates perfectly, the frets feel great, and all in all it plays like a dream. Probably the best of all three of my `vettes.

About the only thing I may change is the pickup. I'm starting to really like the stock Gretsch Hi-Sens Filtertron in my Astro Jet. Much more so than the Powertrons in my other `vettes and the Powertron Plus in this one. The Filtertron doesn't have nearly as much of a humbucker character as these Powertrons do, and I find I prefer that. There is an edgey rudeness to the stock Filtertron and a lack of mids compared to the Powertrons that sound good in the mix with our band.

I think I'm going to experiment with some different pickups and may be switching all my Gretsches to what I find I like best. That could be a Hi-Sens Filtertron (essentially the factory stock Gretsch pickup), a Hot Rod Filtertron, a TV Jones Classic or a TV Jones Classic Plus. Those are my options, as I see things right now.

Click on the photo for the gallery of final pictures. No more refinishing projects this year as winter is almost here. I have a number of amp and pedal projects though, so I've got stuff to tinker with.

From 1966 Corvette finished

Tuesday, September 29, 2009

Pretty cool

I went home after work for a couple hours friday and got the Corvette wrapped up so I could bring it with me for the weekend. Of course, I forgot my camera so I have no photos of it! I'm very pleased with the final result. It plays great, sounds great and looks fabulous. Those big old Grover tuners make it a bit neck heavy, but I think I can deal with that fine. The neck feels great, the frets are excellent, the Powertron Plus is pretty hot and I'm getting some interesting harmonics from the trapeze when I want, which is cool. The D slot in the nut needs a bit of tweaking, and I may need to fine tune a couple other things, but not much. I'll try to get some photos in the next week or so and post them here.


So last night I built the footswitch for my $100 Peavey Triumph 60. I cannot remember if I spoke of it here, but I picked up just the chassis on ebay for $103 shipped on one of those, put a bid in and figure you won't win deals. I won though. No tubes, no footswitch, no reverb tank, no cabinet. Guy said he thought it worked, but thought it might also have a problem. I threw some old tubes in it (2 X 6L6GC, 1 X 12AT7, 4 X 12AX7) that I had laying around and I knew to be good. Hooked up my Marshall 1965A cab and gave it a whirl (after a cursory visual inspection, of course).

From Peavey Triumph 60 amp


No footswitch meant it was stuck on the highest gain channel (Peavey calls it Ultra), but it worked fine with no pops, hums or issues at all. I sourced a schematic from the Peavey forum and, lucky for me, it included the schematic for the footswitch. I drew up my own annotated version and started gathering parts. I found a old three button footswitch on ebay that was ending soon and snagged that for $19.95 shipping inclusive and waited for it to get there.

From Peavey Triumph 60 amp


It arrived friday and I set to work. In gutting it, I was able to salvage the three SPDT (single pole double throw) switches, two of which I needed. The rest had to be bought and built up. Upon first completion, nothing was working right, so I took it back apart and realized I'd wired the diodes backwards! Short lead negative! Short lead negative! Short lead negative, dammit! Oh well, it only took about two minutes to fix that and then everything worked like a charm! I have around $45 in the footswitch. Apparently Peavey will build them for you at $75 plus shipping, so I did OK.

Pretty cool amp with lots of gain on tap. I need to mess with it for a while to find what sort of tones are available. I've wanted one of the older three channel Peavey's for a while and am thrilled to have found one on the cheap.

From Peavey Triumph 60 amp


While I was getting the various bits I stopped at a electronics parts store near me and really had a find! The guy turns up old tubes now and then and often prices them very well. I need to snap some pictures, but I got four mid 60's vintage American made Tung Sol 12AX7s new in the box (and even in the dislplay box!). $19.95 a piece! From what I can tell these usually fetch $80 per tube and up, so I got a helluva deal. I need to try one or two out in V1 of some of my amps see how they sound. Some claim they are the best sounding American made 12AX7, even better than the black plate RCAs that sell for stupid amounts of money.

Wednesday, September 23, 2009

Much better...

Last week I started sanding out the Corvette. I got through 800 and part way into 1000 grit before the weekend. Monday night I finished with the 1000 and did 1200 grit. Last night I used 1500 and then 2000, wiped it down and got the buffer out. It's not quite a mirror shine, but it's closer than I've gotten yet. I think I needed to spend more time with each grit to ensure the previous grit's scratches where completely eliminated. I have some fine swirl marks in the finish still. Overall though, I don't think I have a single sand through, it's smooth and shiny and it looks good.

This morning I installed the pickup, which required some wood removal on the floor of the pickup route. I decided to use the clear pickup ring. I also installed the bridge bushings and was able to route a ground wire from the treble side post to the control cavity. I have a aged bone blank for the nut and will start on that next. I also need to decide if I'm going to go with coil splitting or not. The pickup, a TV Jones Powertron Plus, is wired for it and I think I have a push/pull pot to use. Or I could go with a micro switch and drill a new hole in the non-original guard. Lastly, I dropped the output jack cup in a jar of lacquer thinner in prep for cleaning and installation.

I'll edit and add some photos when our mail is up and running here at work....

From 66 Corvette work

Wednesday, September 9, 2009

Hmm...not my proudest moment.

But I want to share the failures along with the successes. I learn from both, after all.

The Explorer is, essentially, done. When I got home from work tuesday I briefly considered reshooting black then clear on the edges to address the blushing problem. Rather, I commenced sanding and then polishing to see what I had before I started painting yet again. Glad I did, in a way. Once I'd gone through 2000 grit wet/dry using mineral spirits I got the buffer out and brought up some shine.

Oh. Worse than I thought:(

I had blushing EVERYWHERE. On the front, on the back, pretty much all over the place. Ugh. There would be only one way to fix it and that is sand it back down to the amber base color and start all over again with the browns, black and clear.

Bad blushing!

From Explorer Kit


There was a time in my life I was enough of a perfectionist to do just that. Not any more. This guitar is just not that important to me to completely re-do. If it was vintage or particularly sweet in some other way I probably would, but it's a kit I bought on a whim. So...I pushed ahead and got her built.

My form of committing to the ugliness was hammering in the bridge and stop tail bushings. They where a tight fit before paint and are really in there solid after paint. It took a bit of grinding in the pup routes and some finagling to get the Schallers in, and the wiring was a very tight fit, but it all went together eventually. I installed some new CTS 500k solid shaft pots I picked up over the weekend, the Switchcraft switch and jack and the .047µF cap that came with the kit. The stock bridge, stop tail and tuners went on as well. I even re-used the strings I had on it before I started the finishing.

I decided to make a new nut from bone. I had one I'd made for a previous project that didn't go correctly. I'd gotten the string spacing wrong. Luckily it was wide enough and too tall. By sanding down the top, I got it to the right height and eliminated the original string slots. So it only took about 10 minutes to get the nut set up for slotting. I got it right this time.

Once it was all done and strung up I played it for around an hour before I went to bed. I really like these Schallers. They are bright (for humbuckers), articulate and pretty damn hot. They have more of a DiMarzio character than Seymour Duncan character, which is what I prefer in the end. Very nice. They're keepers.

This AM I fixed a little problem with the switch (I had wired it backwards to how I prefer it) and took some pictures in the not very bright light. They pretty much suck, but I will get some better ones on a weekend soon. I played it for a while longer through a different amp and was again impressed. Then I took the strings off and put a third coat of raw linseed oil on the fret board. It's been very thirsty and is darkening up nicely now that it's getting some oil. I like the figuring of the rosewood.

So, it plays quite well and sounds very good (aggressive and very 80's to my ear). The important stuff is right....it's just that it is as ugly as homemade sin. Oh well. I can live with that.

I am replacing the stop tail with a heavier one I have laying around to aid in strap balance. It's better than it was and almost acceptable now, so that might be the last bit that is needed. The back plate is a temp for now. I need to get some thicker, proper, pickguard material to make one from. I also need to decided if I will refret it or not. The frets are level enough for the kind of action I like, and they don't feel too bad, but I'd really like frets of my own choosing in there, especially ones that have not been over beveled, as these are. Last bit I think I will do is get a couple bottles of Grolsch so I can make some home made strap locks for it. (The washers on those flip top bottle caps make good cheapey strap locks).

In thinking about it, I have about $180 in the kit, about $25 in electrical parts and I think I paid about $35 for the pair of Schaller pups on ebay. Add in about three cans of lacquer (estimated total usage) at $8 per can and I have somewhere around...$265 in it total. I think that's pretty good. I have an all mahogany set neck Explorer with quality pups and a nitrocellulose lacquer finish for under $300. Cool.

Here's a link to the album (I'll post an update when I get better photos taken):

Explorer Kit


And a shot of the front:

From Explorer Kit


Lastly...I learned a lot doing this kit. Some of which went into the `66ish Corvette I'm "restoring". It shows too. The `Vette is currently is hanging and curing prior to the process of rubbing out the finish. It looks fabulous and will turn out 100% better than this did. I'm very happy to have made my mistakes on this cool Explorer clone and not on my vintage Gretsch.

Thursday, September 3, 2009

Eegads

I got four more passes on the `vette last night after work. Looking good! The humidity and temp have been almost perfect for painting, so it's gone very well. It's quite glossy already, so it will take little in the way of sanding and polishing to get it looking gorgeous. I doubt I'll put anymore gloss on. If I do, it will have to be next week as I have band practice tonight and will not have another opportunity to spray this week as it's too cold in the mornings right now. Probably just leave well enough alone and not apply anymore. It got three passes over the sand and sealer, then the color coats, then 10 passes over that. I think that should be plenty of clear. I want to let it cure for at least a week before sand out, maybe two.

I took a good close look at the Explorer after I was done spraying and started the process of sanding it out. It's not exactly my finest work. I was having a lot of issues with high humidty and blushing. Especially on the black bits. I get this kind of crazing in areas, like a lot of little white pits that essentially will not sand out. The Explorer has a lot of them on the edges. Nothing on the front or back of the body, just a small area on the back of the headstock.

I got the neck and headstock sanded out to 2000 grit this morning. The body has only been gone over with 600 so far. I think I will go ahead and sand the body out to 2000 and see where I stand. I could then polish it out with my buffer and start assembly, or I may consider respraying the black areas (especially the edges) and then starting again with the clear. If the weather holds I should be able to get a nicer series of clear coats on that would look more like my other projects (like the Corvette). I just don't know:

a) How important it is to me to get this one "perfect"
b) If the weather will hold for spraying
c) If I want to invest the extra time this will add to the process...probably three weeks.

I suppose the big stumbling block is it's difficult to get the bushings in and out of this one. I do not want to have to work around them when finishing. Once I reinstall them, they're going to be pretty much in there for good. So going back won't be much of an option. A plus side to having one that's not "perfect" is I am way less worried about the first dings and scrapes. It might be just the guitar to leave at practice as a backup to my Ibanez. I don't have anything there right now and no real prospect for something I care to leave there all the time. If I break a string on the Ibanez it will just be a pain in the butt and I'll have to make everyone wait while I fix it. With the Explorer I'd be good to go.

I'll ponder all this over the weekend and keep an eye on the forecast. I will also figure out if I want to refret the Explorer. The factory frets are overbeveled. That effectively narrows the fretboard by a significant amount. It didn't bother me too much when I had it together to test play for a couple months, but i I'm going to fix it, now's a good time. It would only take a couple days to do and I think I have some fret wire that would be perfect for the job. If the original frets are kept, I will still need to do a level, crown and dress on them.

Wednesday, September 2, 2009

Sweet!

Monday after work I made my final decision on color. I drug out and assembled my old spray rig and started back painting. First I used Behlin's walnut toner to shade the edges. Then I used their natural (kind of a golden oak) to warm up the center. I'm very pleased with the final effect. I started clear coating that night and got three passes done monday, three tuesday and will try to do three tonight. It's getting very glossy. I may put the three on tonight and stop. Overall I like that way things are going. The burst effect is pretty subtle in person, the grain still shows through nicely and I'm kinda glad I threw caution to the wind and followed my gut instinct to just start throwing color on it.

The spray rig. CO2 tank, beer regulator rigged to fit (thanks Eric!) and Iwata Eclipse.

From 66 Corvette work


Before clear coats

From 66 Corvette work

Friday, August 28, 2009

DAMMIT!!!

I DO NOT need another guitar. I need to SELL some guitars. But the GAS is bad for this one.....argghhh. Hmmm....wrap around tail piece, custom headtsock shape with custom inlay, and some Dynasonic pickups (or maybe the new "Dyna like" pickups GFS are coming out with). Dang...

Do not be terribly surprised if I update this before days end with a "trigger pulled" note....


From Stuff

Thursday, August 27, 2009

Yay! Pictures!

Finally, some new photos. Before work this morning I drug the Explorer and Corvette outside and shot their progress to date. First, the Explorer:

No progress yet...this is what she looks like at this time. It's all gassed out and ready to sand and buff. I figure I'll work on that when the `vette is all painted. Probably not much more on updates for the Explorer till it's done, really. Beside rubbing it out, all I need to do is a fret level, new nut and assembly. Run of the mill stuff.....maybe I document the processes, maybe not...we shall see..

Click on the photo to see the Explorer Gallery:

From Explorer Kit


On the Corvette I have made much progress. I finished stripping all the old house paint and varnish off. Sanded it out. Filled the grain. Shot sand and sealer. Sanded that out. Then shot a couple passes of clear on it. Then I sanded the headstock face smooth and tried to touch up the Gretsch decal just a little bit. After I had masked it off, I shot the headstock face black and then put a couple coats of clear on it. IN and amongst that process I also pulled the old frets and sanded to board to re-radius it to 12" and smooth it out. I refretted, leveled and crowned and smoothed the ends on the new frets as well.

So...at this point I need to decided how I want it to look. I have three options I am considering. Keeping it like it looks now...which would mean just shooting more clear. Doing a natural burst...basically fogging dome medium walnut tinted clear around the edges to give it a bit of a burst finish. I also have enough Stew Mac Cherry toner left from my Astro Jet project to finish it in clear red. I am going to not have a chance to work on it again till early next week, so I have the time between then and now to contemplate this. I suppose I could also finish it like the Explorer somewhat....clear yellow(ish) in the middle, medium brown around the edges fading into a darker brown I have. Hmmm..

Again, clicking on the photo opens a gallery with more pics. The darker area on the right side of the body is from the original pickguard (long gone). When it deteriorated / disintegrated it did something to the wood...something soaked into it.

From 66 Corvette work

Thursday, August 20, 2009

Really, I do...

..I have some photos of various things I've been working on, but time and circumstances means I don't know when I'll be able to edit and upload them. Lots going on here not guitar related. But, that doesn't mean I haven't had the chance to get a little work done to help me wind down after a day. Let's see...

The Explorer still hangs and dries. It's actually ready to sand out and polish now, but I've been focused on other things. Soon I will get back to it and wrap it up.

I got the bridge holes drilled for the `64ish Corvette. I also pulled the old frets then smoothed and leveled the board. It was really evident how small the old frets really where once they're out. I'll try to get a photo up.

A while back I acquired a fret bending tool for a great price. It's the roller kind that does great, consistent bends and is easy to use. I ran some Stew Mac fret stock I got off ebay through it and used some Titebond 1 to glue them in. I Dremeled the ends off last night and leveled them. Started the crowning process and ran out of steam before I could finish. This morning I finished crowning, rounding the ends and then did the polishing with my Micro Mesh. They look great. The wire is smaller than what I used on my `61 Corvette. I need to look up the exact dimensions, but it's kind of the width of current Gibson wire, but the height of current Fender wire. I nice compromise to my taste. I think I'm going to really like them. The tangs where not as deep as the old wire, but I still think they got plenty of bite into the rosewood.

Soooo, I hope to get back to sanding out the Corvette, addressing the headstock (going to try and save the original Gretsch decal) then on to grain fill, sand and seal, etc.

I've put my drill press away, back in the garage, but before I did I worked on that Bulldog LP kit some. I clamped the neck into the body. It's a tight, positive enough fit I knew I could do this to locate the bridge without having to glue yet. I got the bridge and stop tail locations calculated and drilled their holes based on dimensions for Gotoh parts, which is what i will eventually get for it.

Next I drilled out the tuner holes in the headstock to fit some mahogany dowel rod I have. I plugged the original holes with the dowels because they did not line up with the Gibson headstock overlay I'm using. After the glue had dried I trimmed and sanded everything flush and glued the headstock overlay on. It's the older style Gibson logo with the crown in the middle. Then I drilled new 10mm holes in the correct places and set everything aside for another day. I may or may not have the LP ready for finish before the weather turns too cold to paint outside. I'm not going to fret about it, if it happens, it happens. If not, it'll make a nice little winter project.


BTW....this is the leading contender for the Corvette refinish. A "natural burst". Basically just clear coated mahogany with a bit of transparent brown sprayed around the edges. I like it a lot.

From 66 Corvette work

Friday, August 14, 2009

Oops...forgot pictures again...

Didn't do anymore to the Explorer yet..still letting it gas out prior to sadning and polishing the nitro. Might get to that next week. I did make some progress on the Corvette though. It's stripped and I had started sanding it out, but I stopped that for a bit and turned my attention to the bridge this week.

I don't, at the moment, have a permanent place to set up my drill press. So I cleared some space on my bench and lugged it inside and set it up. Damn it's heavy. I used it and my newly acquired 1/2" plug cutter to make some proper mahogany plugs with correct grain orientation. I got the old bridge holes drilled out to 1/2" with a Fostner bit, cut some lengths of 1/2" diameter mahogany dowel that fell short of filling the holes by around a 1/4" or more. This allowed me to use the mahogany plugs to cap off the holes and have wood with the grain going the correct direction instead of end grain, like on my Twist restoration.

Once these had dried overnight (Titebond III), I cut the plugs flush and marked up the exact location of my new Gotoh tuneomatic. I could have sworn I had a 7/16th" diameter drill already, but I could not locate it. Had to run out to the hardware store and pick one up. So, now the new bridge holes are drilled. I think next week I will sand some more and start getting the frets pulled in prep for the refret. Not sure how far I will get...

...because I decided whilst I have the drill press out and set up I will go ahead and do all the drilling on my Bulldog Les Paul kit. It will need to have the headstock tuner holes plugged and redrilled to line up with the Gibson headstock overlay I've acquired. Plus then the bridge and stop tail holes need to be drilled out. I will likely then set it aside and refocus on the Corvette and perhaps some other projects I have in the wings. We shall see.

I don't have any good photos of the Bulldog kit yet, but these are their pics of my exact kit. The gallery also has some representative photos optional one piece neck and a shot of the style of headstock overlay I chose.

From Bulldog LP kit

Tuesday, August 11, 2009

Blush!

I was really fighting the finish on the Explorer that last week. I kept getting blushing on the front as I would apply clear coats. This weekend I picked up a can of Behlin's Blush Eraser. Last night I took the Explorer outside and layed it down face up and shot a couple coats of blush eraser on the problem areas. Miraculously, they disappeared! So the stuff works as advertised. Now, as it has enough clear on it, I just need to wait a week or so, then sand and buff the finish, Here's a terrible photo so far:

From Explorer Kit


Last week I also got started on my "mystery" `vette. I say that because I've not yet precisely dated this one. The serial number is more or less illegible due to a past refinish by a previous owner. I know the first number is a 4, and thin it's something along the lines of 76?4?, with the question marks representing illegible numbers and the 6 a not 100% certain guess. In any case, it's either a 1964 or a 1965, this much I know.

Anyway, I got all the hardware stripped off and started using Citrus Strip to get that hideous finish off there. It went quickly as it seemed to be house paint overcoated with clear varnish. I'm part way through sanding at this stage and have started working on getting the bridge holes plugged. The original bridge is long gone, someone (around 1982 I think) fitted it with a tuneomatic style, but didn't get it in quite the right place. I have a nice Gotoh tuneomatic I'm going to instal.

From 66 Corvette work


Here's a before shot linked to the "before" gallery as well.

From 1966 Gretsch Corvette

Friday, July 31, 2009

My first burst.

And it's not exactly pretty, but I'm going to run with it. This week I grain filled the Explorer, applied sand & sealer then got it painted with the three tone burst and started the clear coating. I used Behlins spray cans I got at Rockler. After I had a smooth base of sand & sealer I shot it with their Natural Toner, which is sort of like ReRanch neck amber mixed with clear lacquer. It gave the mahogany a nice golden tint and helped even out the color overall of the different pieces of wood.

I tried the paper mask method to get the edges black and was pretty unhappy with the result. I used brown paper grocery sack and it wasn't stiff enough to give me a uniform edge. I think the method is usable, but think poster board(or foam core board) and very careful sizing is necessary to get a more predictable edge.

I pushed ahead though and applied some of their Walnut Toner to blend the natural and black. In theory and practice the colors look great, but the execution leave something to be desired on my part. I sanded some of the walnut off and tried to redo it for a cleaner appearance, but it still didn't turn out quite like I wanted.

The uneven black bugged me a lot though, so I broke out one of my old airbrushes and a can of compressed air I had sitting around and shot more black on the edges to give it a better look. That part turned out real nice. I think next time I'll either use the airbrush for the black and walnut, or try the cone spray tip on the walnut, because the directional tip it comes with was too concentrated to get a good fade.

I could sand it all down and start over, but I'm not inclined to. It looks passable and, frankly, I want to be done with it and move on to the next paint job before the cold weather gets too close. I learned a lot, found readily available colors that work real well on mahogany and am sure the next burst I do will come out just like I want. I'm thinking of the same color combo for my `64 Corvette, perhaps adding a fourth color they have called Dark Walnut to allow an even more subtle bursting effect.

I'll be putting on the final top coats of clear, weather permitting, next week and will get some shots of the Explorer to upload. I wanted to shoot some this morning for this update, but out net was down again at home, so I didn't take the time.

Tuesday, July 14, 2009

Uh-Oh

I finished building my first pedal kit this morning. And it works! It's a General Guitar Gadgets "Rodent" kit, which is a clone of the Pro Co Rat distortion pedal. It uses a OP07 integrated circuit chip in place of the original LM308, but supposedly they're pretty close and it can be retrofitted with the LM308 should I find one.

It only took some time last night and then again this morning to get it together. It was fun. I may be in trouble too. Way too many cool pedals to build out there, in kit form and not, plus modding Boss pedals. This could be a drain on the funds. I've already modded two Boss DS-1 Distortions. One sounds great...the other sounded pretty much like ass, so I did some more/different stuff to it. Better, but still not right.

Anyway, great projects in pedals. Soldering, assembly, and then painting....all the kinds of things my hands like to do. Here are some pics of the Rodent....I'll be trying it out at practice this thursday and then taking it apart to paint. I have a very cool idea on that front. Already have another of their kits at home, the Brown Sound In A Box 2 (BSIABII) and have the Digital Reverb on the way. They have a 20% off sale till tomorrow:)

From Pro Co Rat Clone

Thursday, July 9, 2009

hmm...

From Explorer Kit

Back on the Explorer

Got back to work on the Explorer this week. Not a lot of time to do stuff this week and next because I'm kind of busy learning new songs and preparing for our anniversary party on the 19th, but I needed something to fiddle with to help decompress in the evenings, so back on the bench it goes.

I decided to stick with the kit control layout, switch/volume/tone and routed (by hand with a Dremel) around the cutout for a cover. Not really pretty, but functional. The piece of plastic they supply for the cover isn't the right shape, so I'll have to make one. Template for said job is ready. Also opened everything up to accept full size CTS 500k pots...

From Explorer Kit


If it gets a pickguard, it will be small and not like a typical Gibson style...so I know what I'm not going to do there....just need to decided what, if anything, on the pickguard front.

Since it's a bit neck heavy, I decided to just whack off as much headstock as I could with more of an eye for function than aesthetics. I didn't want to "Parker" it, but after designing a half dozen different shapes in Illustrator, I just sat down with a pencil, sketched in a shape and started cutting wood off with a coping saw. In the end, I'm pleased with it. I have some Gibson vinyl stencils for painting the logo on headstocks and thought about putting one on this. Now I think it will just stay black..unless I decided to try my hand at a simple inlay, like a letter "E" or something.

Here's the result:

From Explorer Kit


On a guitar forum I frequent someone suggested sculpting the heal down. So I did. The end result is much much more comfy high up the neck. Thanks to whomever that was! Looks like this now..big difference. I did this with a little drum sander on my "Dremel" combined with hand sanding with 80 grit, then 120.

From Explorer Kit


Next up is a general sand smooth, then grain filler/sealer and start on the finish.

Oh yeah...here's a shot of the Schaller pickups going in it. Have never heard these, but I had a 80's Schaller once and loved it, so I snagged these off ebay cheap a while back...they now have a home. Expect they'll be pretty hot...they measure around 12-13 kOhms..

From Explorer Kit

Monday, June 29, 2009

Another arrow in the quiver.

I've been playing the Astro Jet quite a bit. It doesn't stay in tune with trem use as well as I'd like. I'm not entirely sure how I feel about that yet. Ideally, it would be great if it held tune...but I'm not sure a) how important that is for me in the real world and b) if the major surgery I suspect it would take to fix it is worth it. I think ultimately it would require removing the zero fret, shortening the fretboard and basically converting the guitar to a conventional nut. That's some fairly serious work and alterations. Going to contemplate it for a while, but I think the next move is to try some 11s on it...that may get it closer to the ballpark.

I'm not sure how I'm gonna pay for it short of selling something, but I could not pass up my latest acquisition. It's on the UPS truck for delivery today. A (supposedly) 1965 Gretsch Corvette. Two pick up version with Burns vibrato, what appears to be the original finish, the original pickguard (though that extra knob is curious) and in overall very nice condition with no breaks or issues, so says the seller. The tuners are not stock...they where swapped out for Grovers (vintage ones by the looks of it). I'm pretty pumped....it was about $850 shipped.

From 1965 Corvette

Friday, June 5, 2009

Mods already

Just a short post to say I made a couple shims from a very old mahogany cigar box I picked up off ebay a while back. They're probably a 1/4" thick and went under the bridge pup. Allowed me to lower the pole pieces and get the body of the pickup close to the strings. Not only does it look better, it sounds much better. Much crisper response, a bit more treble (which is what I wanted) and tweaking pole piece height and amp settings I'm able to get that wonderful almost dissonent musical distortion `trons can do under gain. Loving it! Might shim the neck pup some now too as the output isn't balanced well anymore...and it'll help get the same tonal qualities I've found in the bridge pup.

This is a great read on adjusting Filtertrons, scroll down a bit:

http://gretschpages.com/articles/mals-big-guide-guitar-setup-and-troubleshooting/

Monday, June 1, 2009

May or may not be the last post on the Astro..

Brought the guitar with me to my girl friend's for the weekend. Lots of compliments from her and her dad on it, which was very nice. I got to play it quite a bit and begin the process of familiarization. It's a great guitar to sit and play and also stand, as it balances perfectly. My heaviest guitar to be sure, but still not too bad since it's under 9 pounds. It plays very well, but will need some tweaking. The E string seems a touch muddy, so I want to mess with pick up pole piece heghts on it. The G string is a bit loud, so those pole pieces need to be lowered.

The string spacing is comfortable, as is the neck profile. You can tell this was/is a professional grade Gretsch. I'm quite happy at this point and look forward to playing it a lot more in the coming weeks. Not sure when the next band practice is, but that will be it's first test of fire. Only real problem so far, is it does not stay in tune when the trem is used. Not 100% sure of the cause(s), but suspect a lot of it is the nut. I'm not 100% satisfied with how the first one came out, so I might just start a second one this week. I think I can improve upon it. When I initially mocked the guitar up the first time, it seemed to hold tune fairly well, much better than now. Obviously, I will be tweaking and trying things to get it back to that point. I will say the light fret level I did made all the difference in playability. It plays very well now.

Got a chance to shoot some photos saturday. Here's the gallery:

From Astro Jet Final

Friday, May 29, 2009

Pretty much wrapped up.

Interesting evening. Late yesterday at work I finalized the control layout. I hope it feels comfortable on stage, but if not I can always get another guard cheap and re-do it. I printed off a template to guide where to drill the holes for the pots and switch and took it home. I stopped at Radio Shack on the way to see if they had some 150kOhm resistors and ,001µF capacitors because I wanted to put treble bleed circuits on both volume pots. Yes to the caps. no to the resistors. I thought about it for a bit and figued I'd go wth a 100kOhm and 47kOhm in series, which they did have. Luckily, there's no shortage of room in the control route for the Astro Jet, so space wasn't a issue. I did buy a chicklet .022µF tone cap, but ended up using a Spraque Orange Drop I had at home. It's a whopper because it's rated for 600 volts, but it'll work fine.

From Astro Jet Work 2


I kinda forgot to get some glue of some type for the shielding foil....so I cast about and found this Clear Parts Adhesive from Testors model paint company. It was left over from my model making days and I figured it'd work OK.

From Astro Jet Work 2


It did...smear this stuff around on the guard, apply aluminum foil, smooth out with something that has a hard straight edge, trim with a hobby knife (I prefer Olfa) and your done. This, of course, was accomplished after drilling (and reaming, in the case of the switch) the holes for the controls. Our net was down last night and all I had at hand was a Les Paul style wiring diagram. I knew that would work for my volume controls, but I only wanted one tone. I pondered it for a while, and came up something I thought would work. Checking the wiring diagrams at Seymour Duncan's website this morning, I see I came up with the exact same solution they did.:)


It works fine, but I lose all output if I roll the tone control to zero. Not sure if there's a way around that...or if it's even a problem. I LOVE the treble bleed. Not sure it's the ticket for my single pickup Corvettes, but it may be. Certainly easy and cheap enough to try it out, see if I like it. Just the ticket for the Asrto Jet though. Here's everything all wired and soldered together getting ready to screw the guard down.

From Astro Jet Work 2


At this point I just installed the strap buttons, tuned her up and proceeded to play for a couple hours. It sounds great, but I may try shimming the bridge pickup with some bits of wood underneath. I had to screw out the pole pieces about 7 full turns to get them near the strings and I wonder if it might be better to get the pup itself up there as far as I can. I'll probably mess with that in the coming weeks. Sadly, it just didn't play that well. A through high E strings where fine, but the low E was buzzing a lot and not giving very good tone. I decided to sleep on it and contemplate what the problem was, as I was fairly sure the zero fret, nut and relief where pretty good. Here's a pic on the bench:

From Astro Jet Work 2


For some reason I woke up at about 5am. Grrr. I wanted to get some rest, but it was not to be. I figured I might as well get up and get to work on the Astro Jet before I headed to work for friday (TGIF!). I had figured out that my problem was I needed to do the fret level I had avoided. They're around 45 years old and where kinda showing their age. I thought I might get by with not working on them...and I was wrong. So, I de-strung, I taped everything off, hit them with a Sharpie, and preceded to do a light level. They're small to begin with, so I really didn't want to take off more than I absolutely had to. I don't care for super low action, so not a whole lot was required, really. I knocked all the Sharpie off the tops, then recrowned and polished. Took maybe an hour and a half. I threw some new strings on, since the ones that had been on it where saved from the original mock-up. Little tweaking, tuning and stretching and it plays much, much better now. The low E is ringing clean and true, the intonation is spot on, the action is where I like it. So far so good...but I brought it with me to show my wonderful girl friend (who'se been following along, Hi Gorgeous!) and her dad. That'll give me the weekend to play it a lot, get to know it and...if the weather cooperates...get some decent pictures outside. I'll post a link to the gallery when that gets accomplished.

Oh...almost forgot. This is a substantial guitar. Way bigger and heavier than my Corvettes. Way bigger than my Gison SG Classic. I believe I remember the lower bout is about 13". It's a big, solid, one piece slab of vintage Honduran mahogany. Pretty big neck and headstock too. Plus, all the hardware, including vibrato, metal Gretsch knobs and what not. This morning at work I decided to throw it on our smaller digital shipping scale. I kinda expected it to be heavier than it is...8.6 pounds. I had a 2004 Gretsch Pro-Jet with Bigsby for a while (sold it)...much smaller guitar. It weighed over 9.5 pounds! I consider 8.6 to be remarkable and at the upper end of what I feel most comfortable with. Made me happy.

Next up....I dunno....back to the Explorer....start on the Harmoney....start on the mid 60's Corvette....hmmm.....we shall see.

Thursday, May 28, 2009

I have heard the Astro Jet!

So after work yesterday I stopped by a couple local music stores that are more or less on the way home and got a Switchcraft L switch, three WD 500K pots (dunno who makes these, not Alpha and not CTS by the looks of them), a Switchcraft 1/4" mono jack and a pump bottle of Gibson Guitar Polish with polishing cloth. I really, really like this stuff! I went over the whole gutar twice with it before I did any further work. It looks remarkable.

From Astro Jet Work 2


The last major chore was cutting a new nut. I have to do this all by hand, as I don't have a belt sander or band saw. I do have a nice Zona saw and a large selection of files, however, so it takes a while longer, but usually goes well. I have heard some repair shops refuse to do new a nut unless it's part of a larger package of work, these days. I can fully understand. I know I've been quoted $50 for a new nut before and while that seems reasonable, if that's all I did for an 8 hour day, I think at best I might be able to get four done....if all went very well.

From Astro Jet Work 2


I made mine from Micarta. This is a synthetic material that, supposedly, is what Martin prefers to make their acoustic guitar nuts from. I have a couple aged bone blanks, but for this guitar I thought I'd use my little stock of Micarta pieces. Since the Astro Jet has a zero fret, the nut more or less serves as a side to side string guide anyway. The Micarta cuts and sands well and can be polished out to a nice shine, plus it matches the binding. As I get into the final setup, I will tweek it as necessary, but it's pretty much good to go right now.

From Astro Jet Work 2


Then I wanted to get the pickups fitted, My FilterTrons have screws that exit out the bottom of the pickup. The original SuperTrons in a Astro Jet have bar pole pieces that don't. So I had to make room for the screws in the routes. Cheap knock off Dremel to the rescue. I removed as little wood as I could and get by. Didn't take long. I had already done the bridge pup, though not quite as elegantly.

From Astro Jet Work 2


Pups installed! I need to get some new screws though. I only had two chrome and two black...not sure how hard it will be to find these locally, or if I'll need to order them online. I bought silver pickup rings and clear pickup rings. I tried the clear first and didn't care for the look on this guitar . So I installed silver, which looks OK to me. I may paint the clear ones black however and install them at a later date. Stock Astro Jet rings where black.

From Astro Jet Work 2


I'd never measured the fret board radius, though I suspected it was pretty flat. Turns out it's about 16". Like a shredder! Ha.

From Astro Jet Work 2


The last thing I did yesterday evening was install the output jack cup. It had been glued in at the factory back in `64 or so with a couple dabs of hide glue. To get those off and get it cleaned up, I just ran it under hot water in the sing for a while. Then a few minutes with a Olfa knife had it all cleaned up. I checked the hole in the body, cleaned out the crap that had accumulated in there and then used a brass hammer and a block of wood to drive it home. Then I cut a couple lengths of wire, soldered them to the Switchcraft jack and got it installed.

Got up early again (gonna need to catch up on sleep soon) and worked on it some more before coming to work. Hit it with some more of that cool Gibson polish, then got the Sperzel tuners put in. Then I trimmed the screws for the tension bar by about 1/8th inch and got it installed. Next I reassembled the Burns, cut a piece of wire for a string ground, and got it installed. I slipped the bridge in place and got an idea how much I was going to need to trim off the base for the pickguard to clear. Once I determined that, I made and cleaned up the cuts, strung the guitar up and connected the bridge pup to the output jack temporarily.

I wanted to get some tension on the neck for the day, but didn't want any pressure on the bridge unless I knew it was where it needed to be, lest it mar the still very fresh (and somewhat soft) lacquer finish. That's why I twisted the pickup and output jack wires together and have, thusly, heard the Astro Jet in it's almost completed form! I tuned it up and slid the bridge around till the intonation was correct and then played a couple tunes on it. Sounds more or less like it did when I mocked it up before undertaking the rebuild. A note on interest was the bridge. I bought it from Joel and Shanghai because I wanted to have a flat bridge base and a tuneomatic style bridge. I had a part number for the bridge used on the BillyBo, which has a flat top and Joel was the only guy who had that bridge and base in stock. Here's the thing, once I had the fore and aft placement of the bridge tweaked based on the low and high E strings, the intonation of all the strings is almost exactly spot on. I know this came off a BillyBo initially, and find it interesting the compensation is essentially identical.

From Astro Jet Work 2


So, not much left to do. Need to decide on the control layout and drill the appropriate holes in the pickguard, Then I need to try and remember to put some shielding (aluminum foil) on the underside, get the pots and switch installed and get everything soldered up. I'm hoping Radio Shack has a suitable .022mF capacitor in case I do not. I might also install a treble bleed on the volume controls. The srap buttons need to be put on, the set up tweaked and then.....

I've got my original pickguard template drawing here at work, which also has the outline of the control cavity on it. I brought dimensions of the pots and switch and knobs so I can do a mockup drawing and see where and how everything might fit together. I even have four knobs and pots, though I may only use three or perhaps two. Here are some pics I took this morning to give me some control visuals:

From Astro Jet Work 2


From Astro Jet Work 2

Wednesday, May 27, 2009

Ohhh...shiney!

I'll be tired later today because I stayed up last night and got up early this morning. Couldn't help myself. When I got home from work last night I still wasn't sure I wanted to put more clear on or start rubbing out the almost two cans I had on there. My goal in all of these refinishes is not a perfect finish, more of a mild relic. A guitar that somewhat reflects it's age and doesn't look plastic like and new. That's partly my own personal aesthetic choice and partly because I like to keep these finishes as thin as possible.

I'm not sure which of the trees that surround the condo give off the puffy white little balls this time every year, perhaps cotton wood?...but they where in full force yesterday. It's almost like a mini-blizzard when it happens. They pile up in drifts in the corners outside and the air is full of them floating around. Since I have to paint outside, their presence meant no painting yesterday. I decided to treat that as a omen and proceeded to sand out the paint.

I used mineral spirits for the lubricant (the "wet" part of wet sand). It works very well as I use the low odor stuff, it's got good lubricating properties and I don't have to worry about it getting into holes and swelling the wood. 3M's Imperial wet or dry (the good stuff) in 600, 800, 1200, 1500 then 2000 grits and a small art eraser as a sanding block.

I went slow, started with the neck and headstock, then moved to the body. Took till just short of midnight to get everything sanded out. But, by in large, I was very happy with how smooth it came out and that I only had one area of sand through about the size of the first joint of my little finger. I considered that a success!

So, this morning I got up a little early and got out my Titan 6" buffer I had bought a couple years ago at Auto Zone (something like $30), my bottles of Meguiars cleaner #1 and polisher #2 and started buffing. The little Titan makes short work of this step!

From Astro Jet Work 2


It took maybe an hour to get it where I wanted it more or less. I think I may get some of the Gibson guitar polish and work on it a bit more...not sure yet. Rumor has it it's good stuff for a lacquer finish and "even has a little bit of finish in it" what ever that means.

Here's a close up giving you an idea of the level of shine I like:

From Astro Jet Work 2


And a terrible overall...bad lighting this morning due to clouds....and a terrible photographer as well...

From Astro Jet Work 2


So, I stripped the tape off the fret board, cleaned up some adhesive residue and gave the ebony it's first coat of raw linseed oil. It was thirsty! I might give it another drink after work today, I'm not sure.

Still lots of work left to do, but the "hard" part is over. Perhaps if all goes well I can finish it for the weekend. I need to get three pots, a switch and maybe a capacitor to wrap up the electrics though, so I may need to make a trip to Sam Ash tonight or tomorrow...

Friday, May 22, 2009

So far, so good

Got another three coats of clear on after work. I put these on a bit heavier than the first three, but not what I would call super wet. It looks pretty rough right after you shoot, but the lacquer flows out some as it dries and starts smoothing fairly well. I inspected it again before I left for the weekend and it's getting nice and glossy.

From Astro Jet Work 2


I'm not sure how much more I will put on. I'm not going for a flawless finish or a super high gloss one like you might find on a factory fresh Gibson. I want relatively thin and moderately glossy. Yesterdays three coats was much of a second can of clear. That kind of freaks me out that it's taking so much paint. It is a big guitar, however, and I am getting a lot of waste given I'm using spray bombs. I figure I'll do another three coats (hopefully) next week and see where it stands. If I think I can buff/sand it out with that amount, I'll stop. I may also sand it out with some quality 400 (or 600) wet dry before I shoot those three coats. I'm going to contemplate that over the weekend. All in all I'm happy with how it's going so far.

I polished a bit more on the tension bar (looking good) and cut the other ear off the neck pup last night as well. Plus I went through my parts making sure I had my knobs, pickup rings and other parts in one place. Time and effort...that's pretty much all that's left...that and a three way switch and some pots and caps...

Thursday, May 21, 2009

Is that a light at tunnel's end?

Got three coats of clear on after work yesterday! Woot! Surprising to me, it took the better part of a whole can to do that...and I felt like I was putting on thin coats. I guess that means, with two other guitars that will be needing finish work, that I'm gonna have to go to Rockler for more clear sometime soon. At least they keep sending me coupons.

So far so good...little orange peeley, but that's not surprising. I'm gonna lay down another three tonight after work, then it will sit till next tuesday. At that point I might sand out with 400 grit...or not...in either case, I plan to do another two three coat sessions and see how it's looking. This Behlins' lacquer dries real fast!

From Astro Jet Work 2


That didn't take long to tack rag/wipe down with degreaser/tack rag again, then paint...so....I started in on some of the other tasks that need to be done. I cut one of the ears off the reissue Hi-Sens filtertron neck pup I got. For some reason they put those extensions on the base plates these days. Too wide for the routes in my Astro, so they must come off. I just razor saw them off (X-Acto) and file them down...not a big deal.

From Astro Jet Work 2


I also started polishing the tension bar parts my buddy Eric made for me. I asked him to leave them unpolished, as I wasn;t sure what way I wanted to go with them. I've decided I want a semi-polish on them. Not as shiney as stainless can get when fully polished...but somewhere in between where they where when I got them and super shiney new. Think used...petina...what ever...think relic if you want...I shall not be. I'm using my cheap knock-off Dremel, some buffing wheels, some toothpaste and the "jewler's rouge" that came with my heap knock-off Dremel. It's gonna take some time...but the round part is coming along seemingly well.

From Astro Jet Work 2


BTW...if you're reading this...ever....think about leaving a comment! Thanks!

Wednesday, May 20, 2009

No rain!

Finally, looks like good weather for the week so I can get some outdoor painting done. Last night I masked off the Gretsch inlay and the rest of the headstock and shot Dupli-Color gloss black lacquer on the face of the headstock. Later, after the paint dried for a while, I removed the inlay mask, and stripped the masking off everything else. I applied new masking to just the nut slot and fret board, so I'm ready to start applying clear coat. First coat tonight after work is the plan....I'll try to shoot a picture at some point...didn't shoot any last night.

Tuesday, May 19, 2009

Just a photo update

I unmasked the headstock this morning and shot a couple photos of the repaired Gretsch headstock inlay. Hopefully after work today I can get this masked off and the headstock shot gloss black. And if the weather holds I'll be able to strat shooting clear this week.

From Astro Jet work 1