Later the next day he adds:
Ok...take a few moments to discuss what happened on this round.
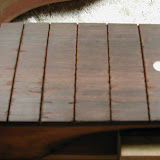
First order of business was to file down the epoxy overflow from the dot markers. Then I finished sanding down the fret board with my radiused sanding blocks. The long one is loaded with 100 grit, and the two short ones are loaded with 150 and 220 grit. I used some 320 grit for the final smoothing passes by hand. Sadly, for some reason I was getting a lot of chip out at the edges of the fret slots....dunno why this was, but I'll just have to live with it.
I contemplated frets for a while and finally decided to go with my Gibson frets. I like their size, liked the tangs and they just gave me an inexplicable warm fuzzy feeling. I have a Zona saw I got at a hobby shop that cuts a kerf that's damn near perfect for the tang on these frets. Cost me $7.95 I think. Zona makes great saws with lots of different kerfs (width of cut), and they're all inexpensive. Good hobby shops will carry most of the line, or will order what you want. Speaking of frets, fret slots and tangs...the original Gretsch frets had extremeley thin tangs....not sure where one would buy frets today that didn't require widing of the fret slots....unless you really needed to do some compression fretting, of course.
Also, I just want to mention...I don't do refrets a lot...so I don't own (nor have I made) a fret bender. But, both Gibson and Fender offer frets in various sizes and radii, so I've always just bought pre-cut and pre-bent frets from them. They work great and are not expensive.
OK, I widened and slightly deepened the slots and proceeded to pound frets in with my new fret hammer (way cool tool, BTW). Once they were all in I flowed a little water thin super glue into the undersides of each fret end to make sure they all stayed down where I wanted them. I don't have a pair of $30 fret cutters, but I do have a (cheap knockoff) Dremel with loads of cut-off wheels....so that's what I like to use to trim off the overhang. Fast and easy! Then I worked the ends down with my leveling file and got them beveled nicely.
Next was masking the board off (I like green tape for this....just because it looks neat) and proceeded to level the frets. Use a Sharpie on their tops so you know when to stop removing material! I also used my long radiused sanding block to make sure I had a nice 12" radius to the frets. The body horns got in the way of deepening the last two slots properly (that's my excuse anyway) so they ended up proud of the others and really needed to be knocked down a lot more. Dangit. Oh well, they'll still work just fine. I made sure I sanded a little bit more as I went down the board so there is a little drop off to the frets in the higher register...which I always like to do.
Once the leveling was done I recrowned everything with my cheap but functional 3 in one crowning file, then used my Stew Mac fret end file to tidy up and round off the fret ends. Lastly, I spent copious amounts of time polishing the frets back to near mirror like status with my MicroMesh sanding kit. It's tedious...but I really like the way the MicroMesh system works.
The next morning I got up a bit early so I could fix a bad spot on the side of the first fret area of the fingerboard. It had chipped out at some point and you could feel the fret end when you ran your hand up and down the neck. It really bugged me. So, I mixed up a bit of epoxy and dumped a whole pile of rosewood sanding dust in it, then applied some to the chipped out area. Then it was off to work!
 |
| Post truss rod repairs and refurb Part2 |
No comments:
Post a Comment